


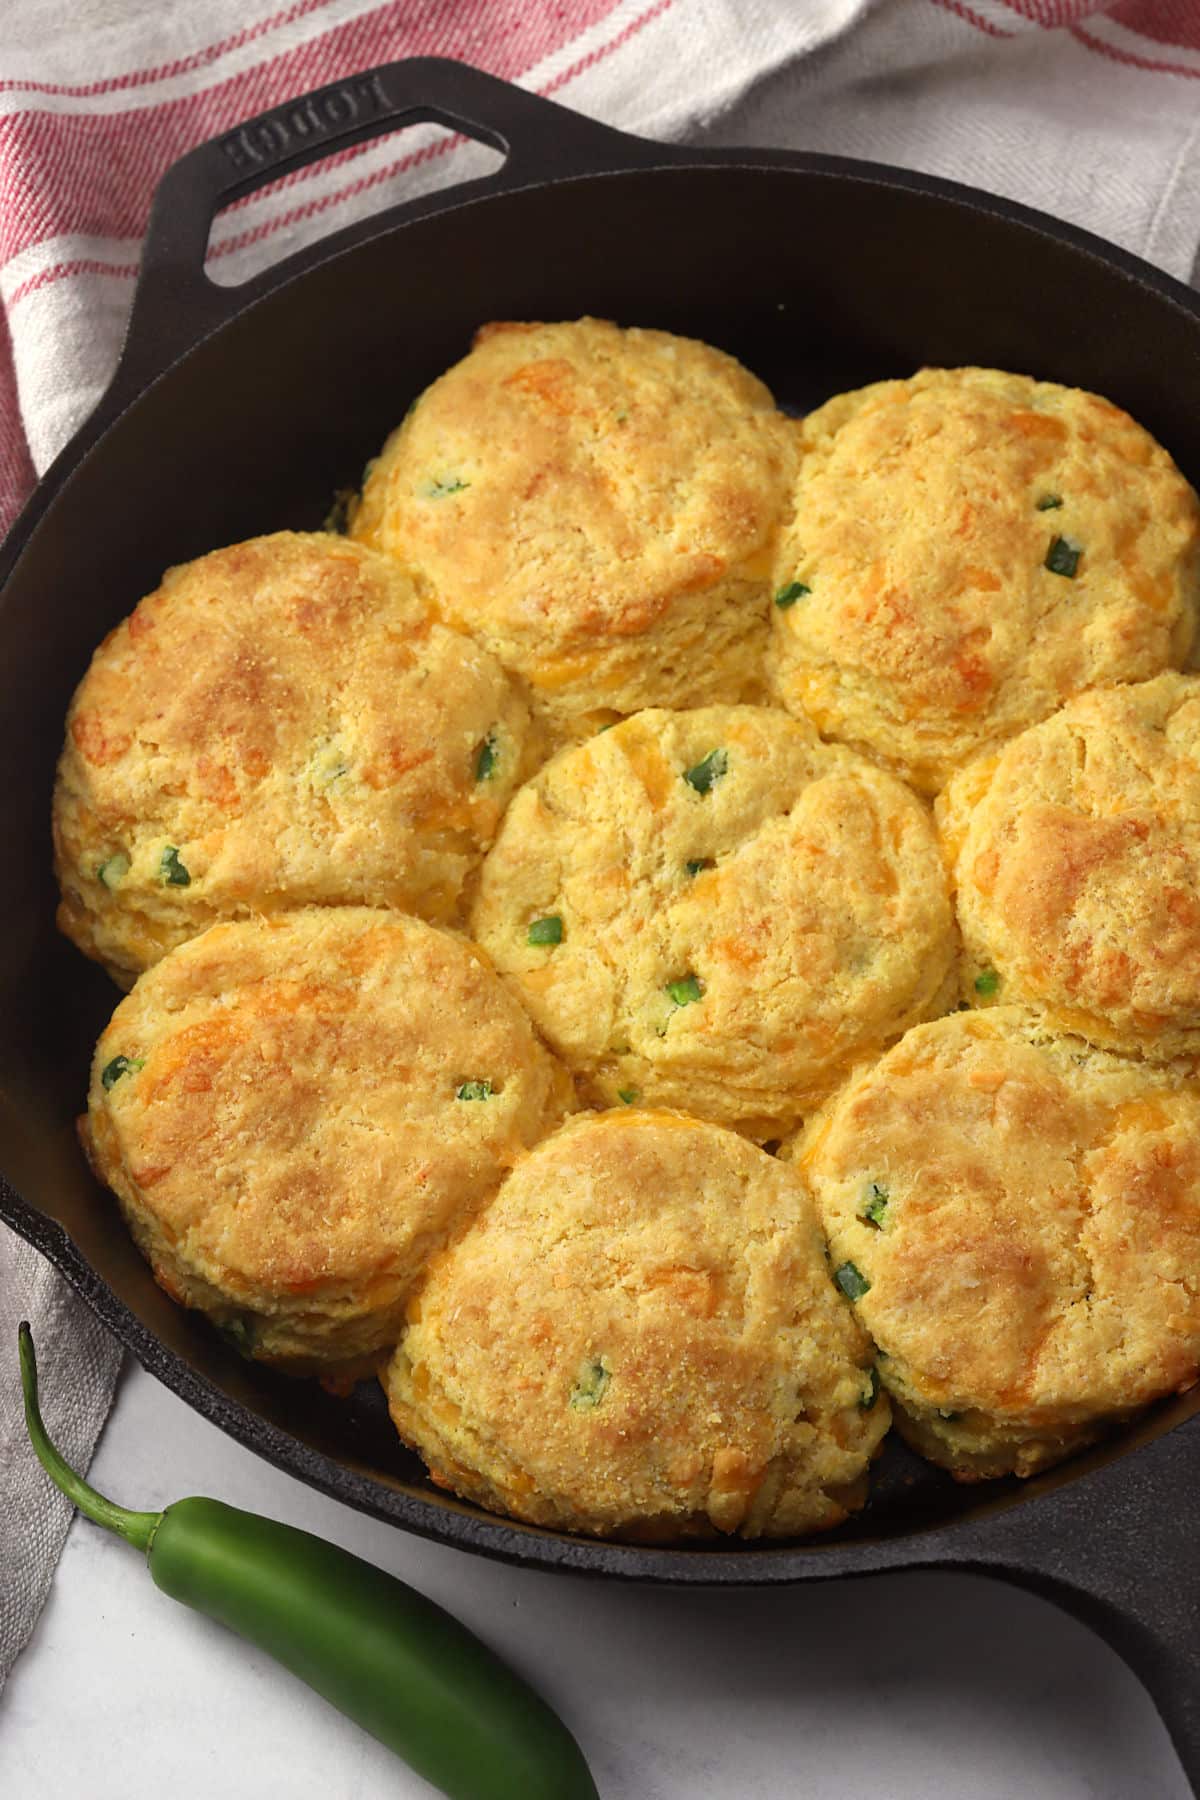
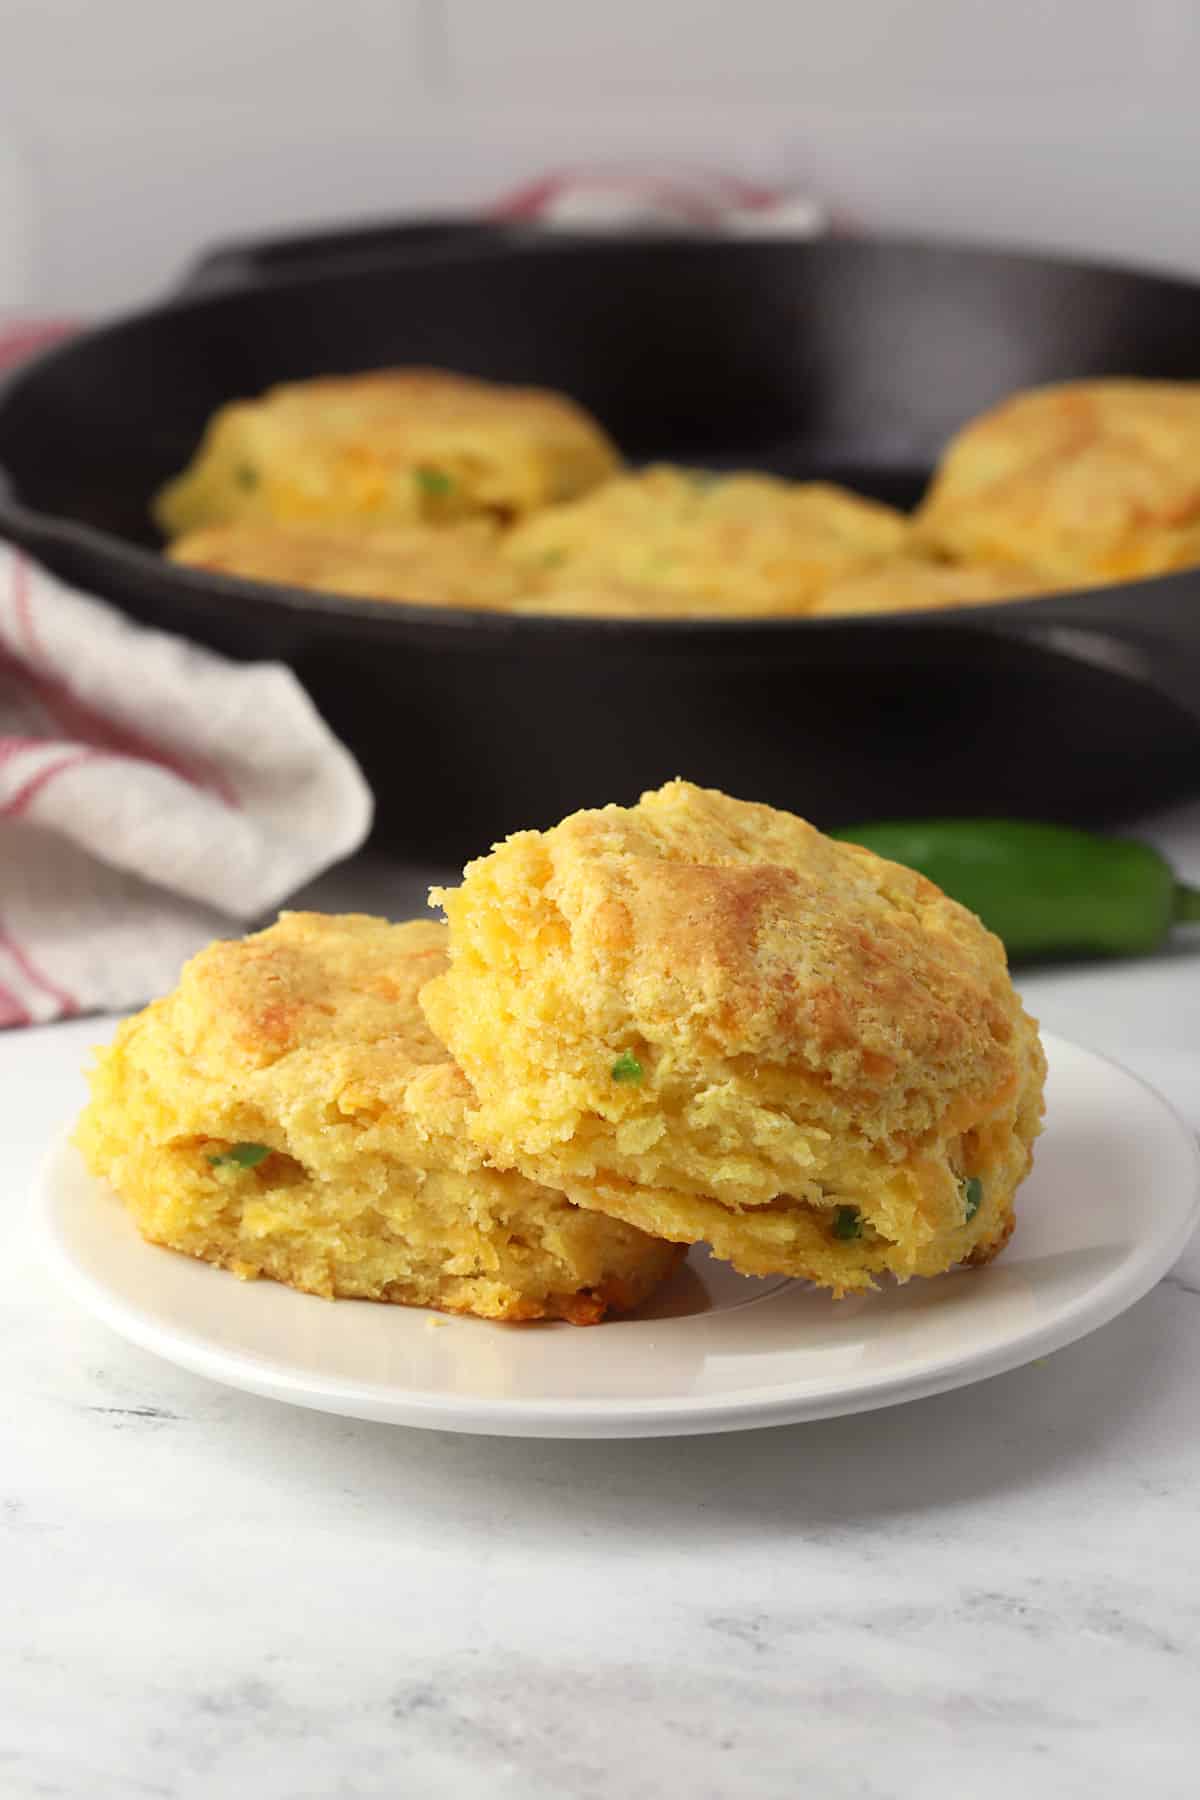
Jalapeño cheddar cornmeal biscuits are the perfect companion for your next bowl of soup or chili. They're flaky, tender, and filled with jalapeños and melty cheddar cheese.
Recipe summary
Flavor/texture: The perfect blend of your favorite cornbread and flaky buttermilk biscuits! They're filled with cheddar cheese, diced jalapenos for a hint of warmth, and cornmeal.
Yield: 8 biscuits
Pan size: 10-inch cast iron
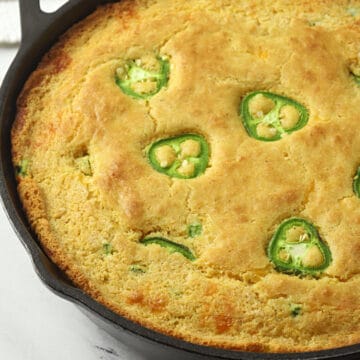
Similar to: Garlic Cheddar Biscuits and Jalapeño Cheddar Cornbread
Jump to:
Ingredients and substitutions
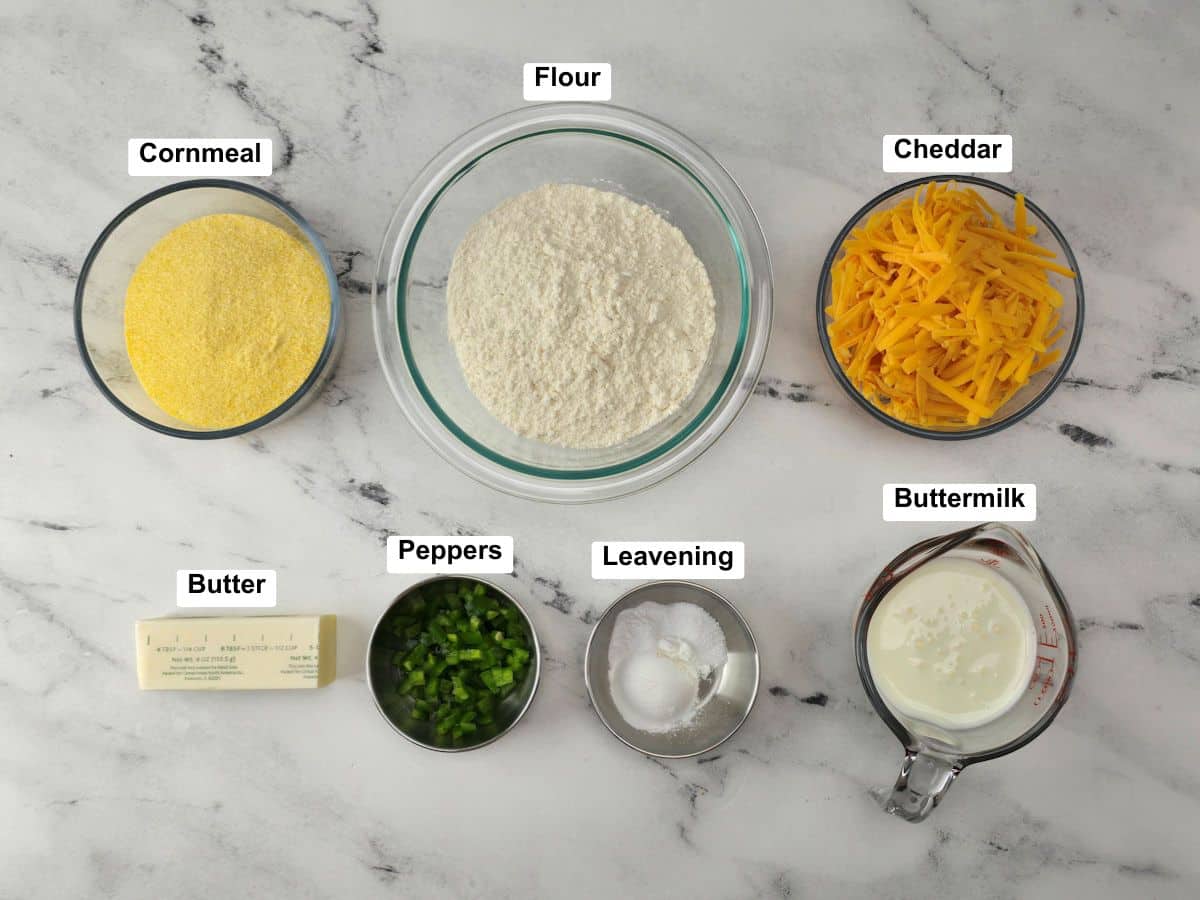
- Cornmeal - I prefer yellow cornmeal in this recipe, but white cornmeal, which has a more subtle flavor, would also work as a substitute.
- Butter - If using salted butter, cut the listed salt in half.
- Cheddar cheese - Monterey jack and pepper jack make great substitutes.
How to make jalapeno cheddar biscuits
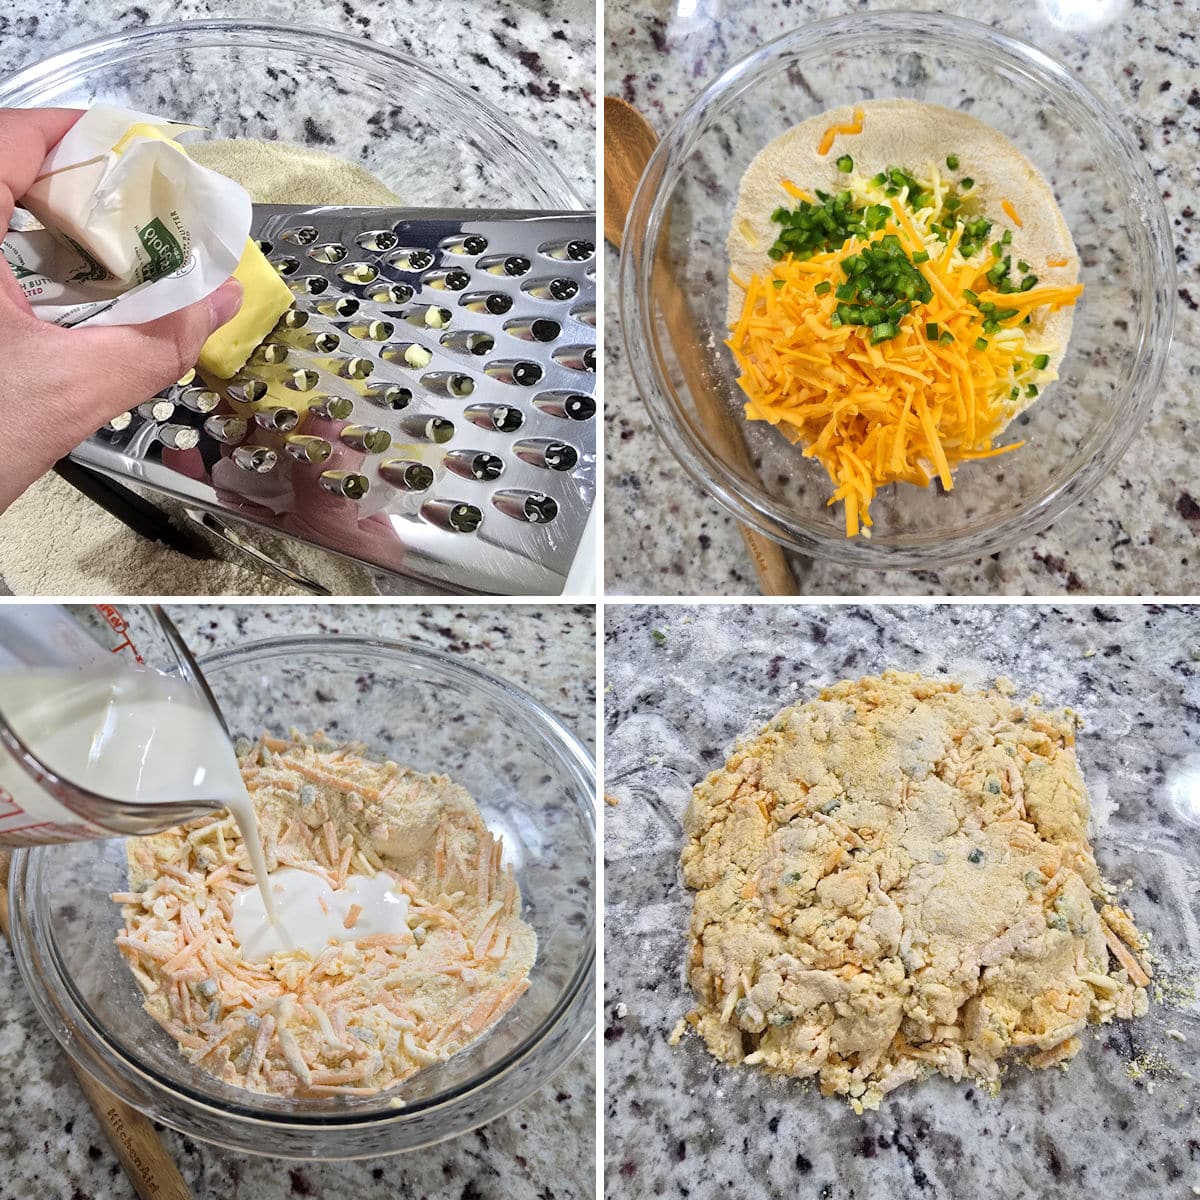
- Whisk dry ingredients in a large bowl, then grate cold butter into the bowl using the large side of a box grater.
- Add cheese and jalapenos to the bowl and toss to combine.
- Make a well in the center and add buttermilk.
- Stir until a crumbly dough forms, then turn out onto a lightly floured surface.
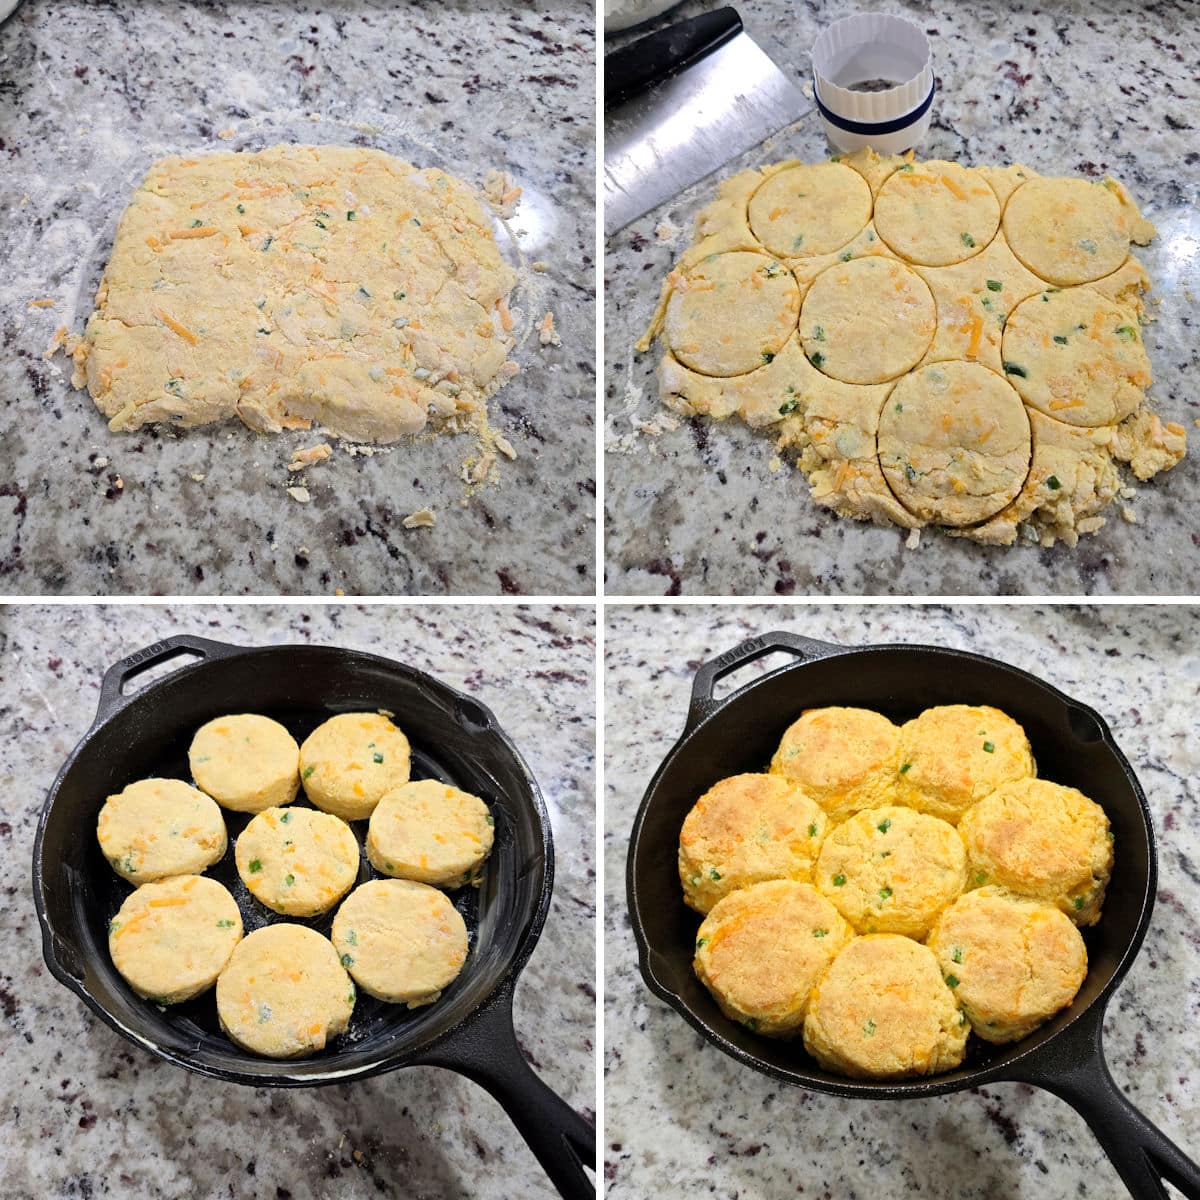
- Gently pat dough into a rectangle, then fold in half. Turn, pat back into a rectangle, and fold again. Fold your dough at least 5 times - this creates flaky layers and a better rise in the oven.
- Slice dough using a biscuit cutter. Reform leftover dough until you have about 8 biscuits.
- Place biscuits into a greased 10-inch cast iron pan.
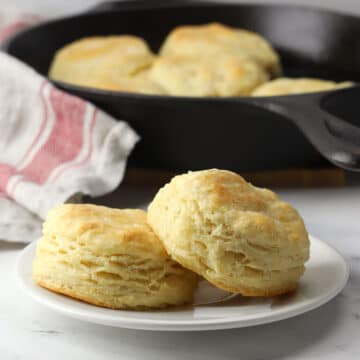
- Bake until tops are lightly browned and set.
Heather's Top Tip
For accurate results every time, use a kitchen scale to measure flour by weight. If you don't have a kitchen scale, use the spoon and level method. Stir the flour (especially if it's been packed down in a bag/container), then gently spoon into the measuring cup, leveling off the top with a knife. Scooping with a measuring cup compacts flour into the cup and adds up to 25% extra to the recipe, resulting in dry, bland baked goods.
Tips and tricks
Cold butter: Make sure your butter is very cold, straight from the refrigerator or freezer. Cold butter is important because you want it to stay solid throughout the dough, instead of melting and incorporating into the flour. Those cold butter pockets produce steam while baking, which creates those flaky layers in the oven.
Grating butter: I recommend grating your butter on the large side of a box grater. The butter shreds incorporate easily into your flour mixture with very little effort.
Handle dough as little as possible: After the buttermilk has been mixed into your dough, it will look shaggy. This is normal. The goal is to handle the dough as little as possible. Warm hands melt the butter in the dough, which we don't want (see above). Plus overworking the gluten in the dough makes your biscuits turn out tough.
Folding the dough: Once your dough is mostly mixed but shaggy and sticky, turn it out onto a floured surface. Gently form your dough into a rectangle and pat it down with your hands. Fold the rectangle in half, then turn it and gently pat it down into a wide rectangle again. You'll do this five times total before cutting out your biscuits. If you're a visual person, here's a great YouTube video showing how exactly to fold biscuit dough: Biscuits and Shortcakes: Folding and Turning
Cutting your biscuits: Your biscuits can be sliced with a knife or cut using a biscuit cutter. When cutting your biscuits, take care not to twist the cutter - this seals the edges of the biscuit, reducing the rise in the oven.
Frequently asked questions
Once completely cooled, transfer baked biscuits to a tightly sealed container. Biscuits will keep for up to 2 days at room temperature or up to a week in the refrigerator.
Yes, biscuits can be frozen in a tightly sealed, freezer-safe container for up to 3 months. To thaw frozen biscuits, transfer to the countertop and allow to thaw for 1-2 hours.
Recommended

📖 Recipe

Jalapeño Cheddar Cornmeal Biscuits
Ingredients
- 1 ¼ cups (150 g) all-purpose flour
- ¾ cup (117 g) cornmeal
- 1 tablespoon baking powder
- ½ teaspoon baking soda
- ½ teaspoon salt
- 6 tablespoons (84 g) unsalted butter, cold
- 4 ounces (113 g) sharp cheddar cheese, shredded
- 1 jalapeno, diced
- ¾ cup (170 g) buttermilk, cold
Instructions
- Preheat oven to 425℉. Butter a 10-inch cast iron skillet or line a baking sheet with parchment paper and set aside.
- In a large bowl, add flour, cornmeal, baking powder, baking soda, and salt. Whisk to combine and remove clumps.
- Grate cold butter using the large side of a box grater and add to flour mixture along with the cheese and diced jalapenos.
- Toss ingredients to coat the mix-ins with flour, breaking up any clumps of butter that form.
- Make a well in the center of the flour mixture and add buttermilk. Gently stir until ingredients are mostly incorporated. Dough will look shaggy and sticky. Pour dough out onto a lightly floured surface.
- Gently pat dough with lightly floured hands into a large, flat rectangle, about 10-12 inches wide and about ¾ inch thick. Keep extra flour nearby and continually flour the surface, dough, and your hands as needed.
- Fold dough rectangle in half, turn to the right to make your new rectangle horizontal, and gently pat back into a large rectangle. Repeat 4 times, folding your dough 5 times in total (this process creates those flaky layers). Pat dough into a large rectangle, about 1 inch thick.
- Using a 2.5 to 3 inch biscuit cutter, cut biscuits out of dough (do not twist your cutter, this seals the edges). Reform leftover dough gently and continue cutting until all dough is used up.
- Place biscuits into prepared skillet or baking sheet, with edges of biscuits touching each other. Bake for about 18-22 minutes, or until golden brown across the tops.
Equipment Recommendations
Notes
- For golden brown tops: Brush tops of biscuits with heavy cream before baking. This helps your biscuits brown in the oven.
- Storage: Homemade biscuits keep for 1-2 days at room temperature in a sealed container, up to 1 week in the refrigerator, or 2-3 months in the freezer. If freezing, seal tightly with foil or plastic wrap and store in a freezer safe container.
Man I wish it was easy to get cornmeal easily in India! This looks superb!!