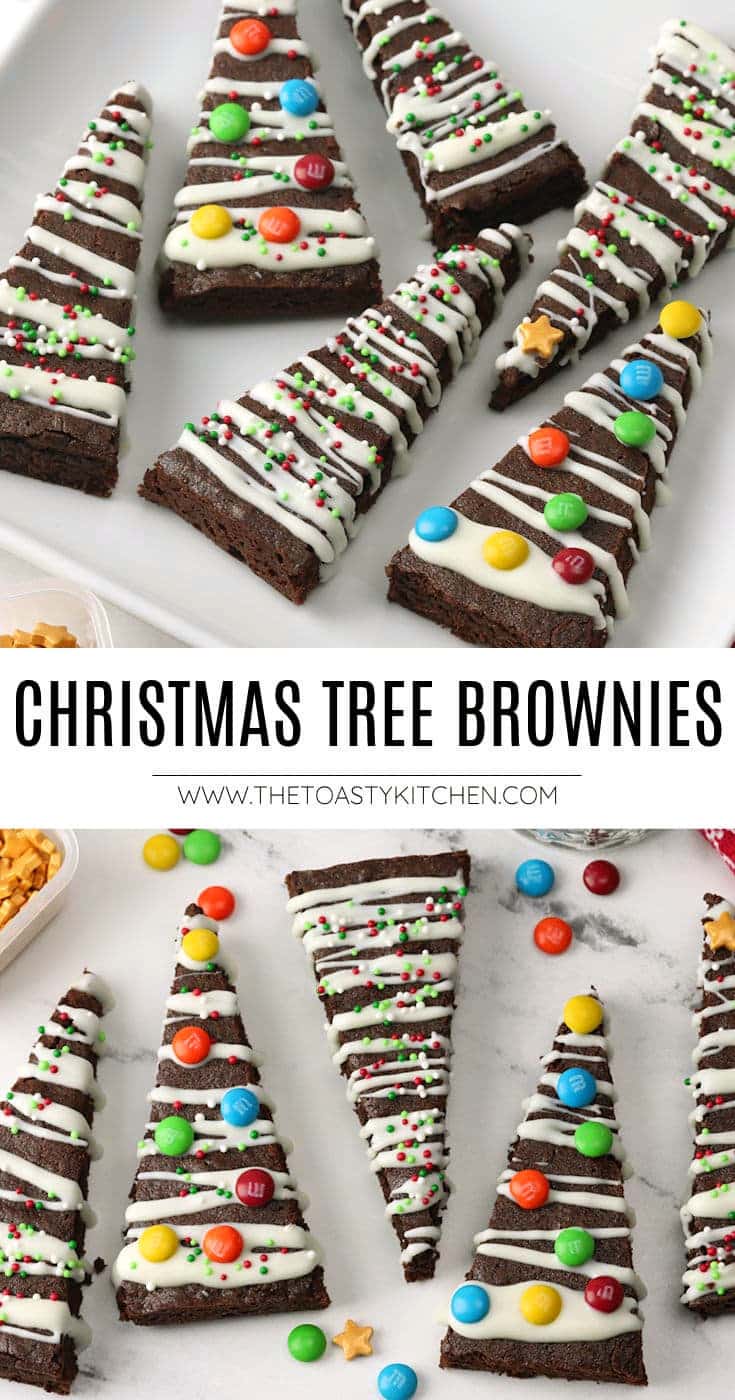
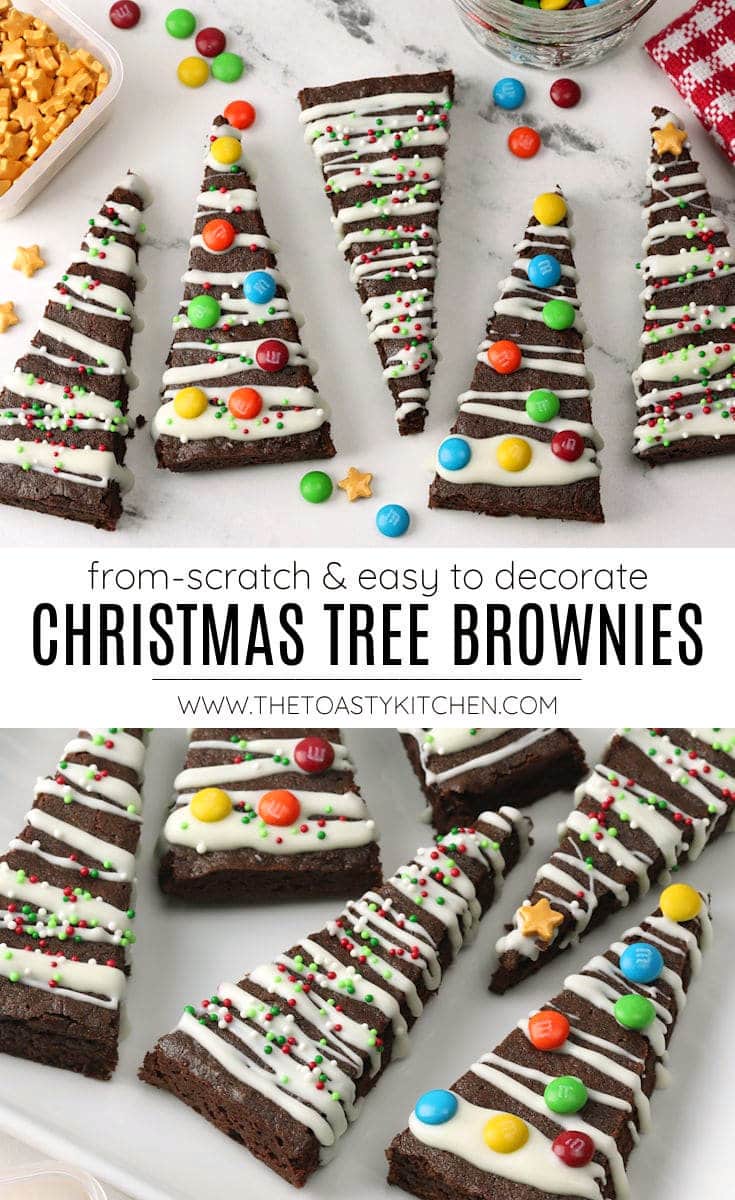
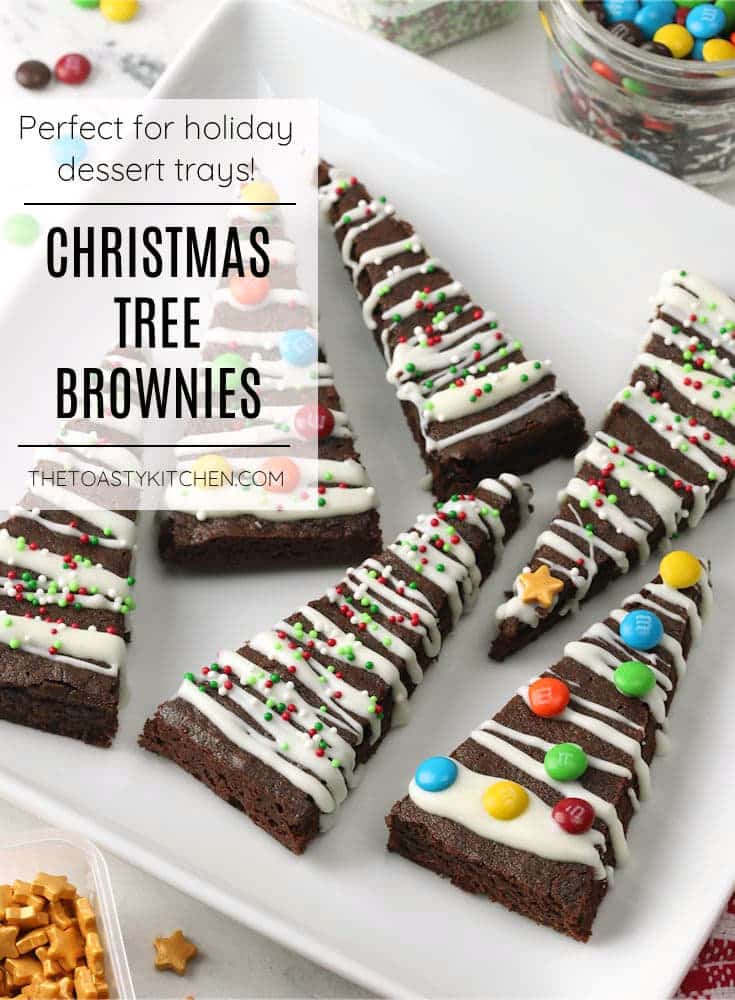
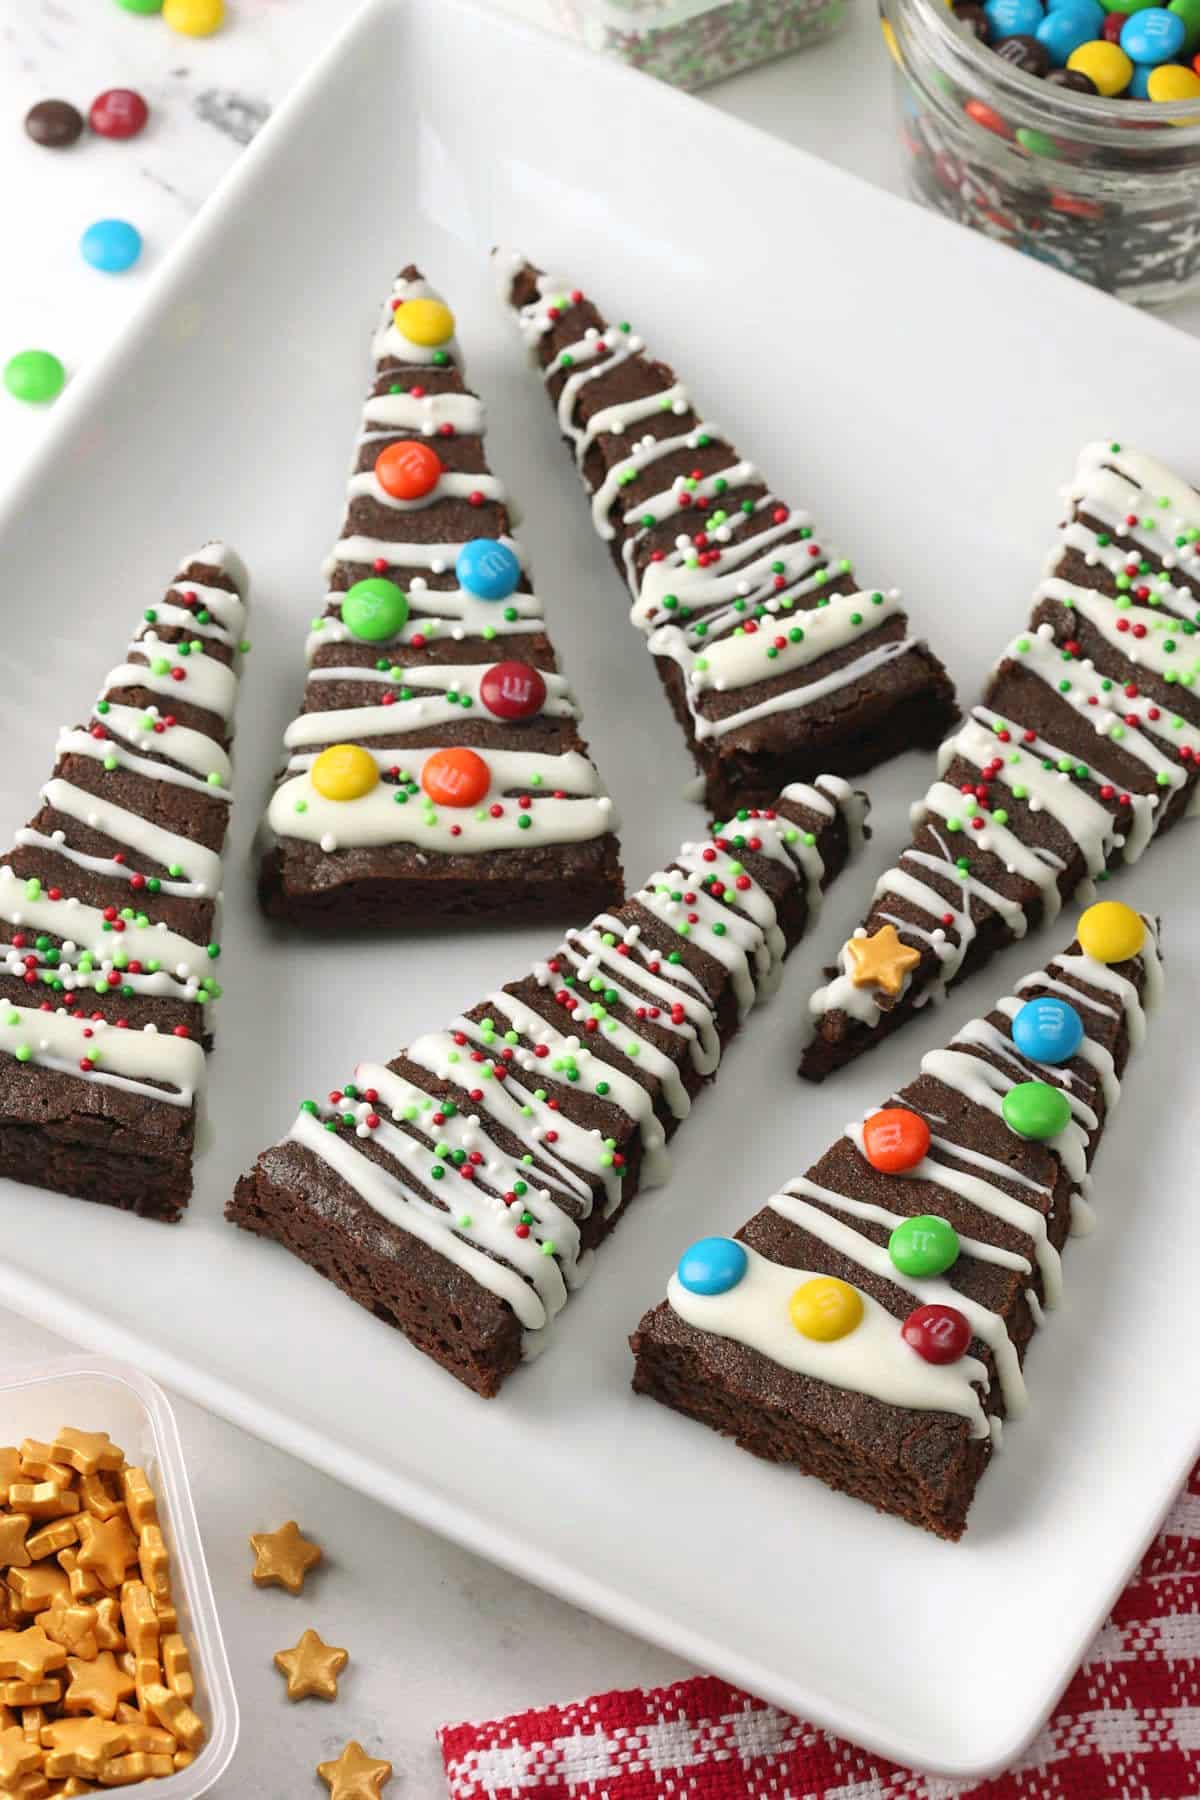
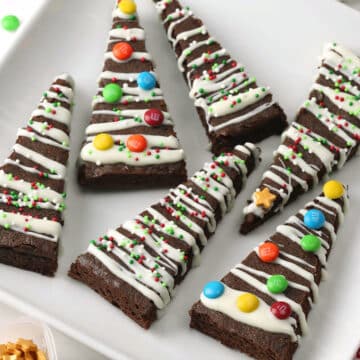
Christmas tree brownies are a festive, fun treat that's great for all ages. Chewy chocolate brownies are decorated with white chocolate drizzle and colorful sprinkles. Perfect for your next holiday dessert tray!
Heather's recipe summary
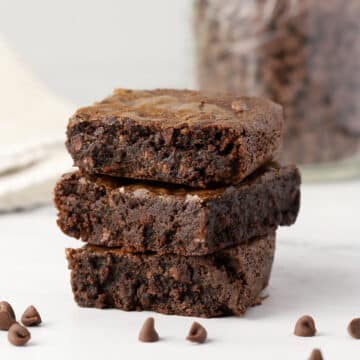
Flavor/texture: Rich, fudgy brownies are topped with white chocolate and candy decorations.
Pan size: 8x8 square
Yield: 14 brownie trees
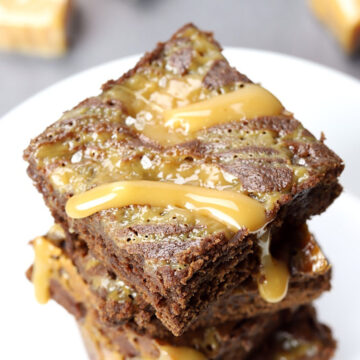
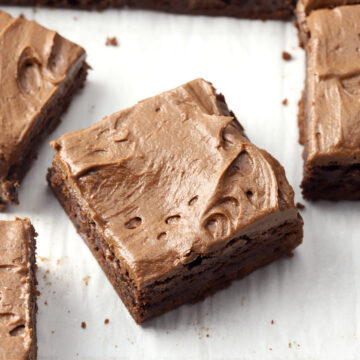
Similar to: Frosted Brownies and Salted Caramel Brownies
Jump to:
Ingredients and substitutions
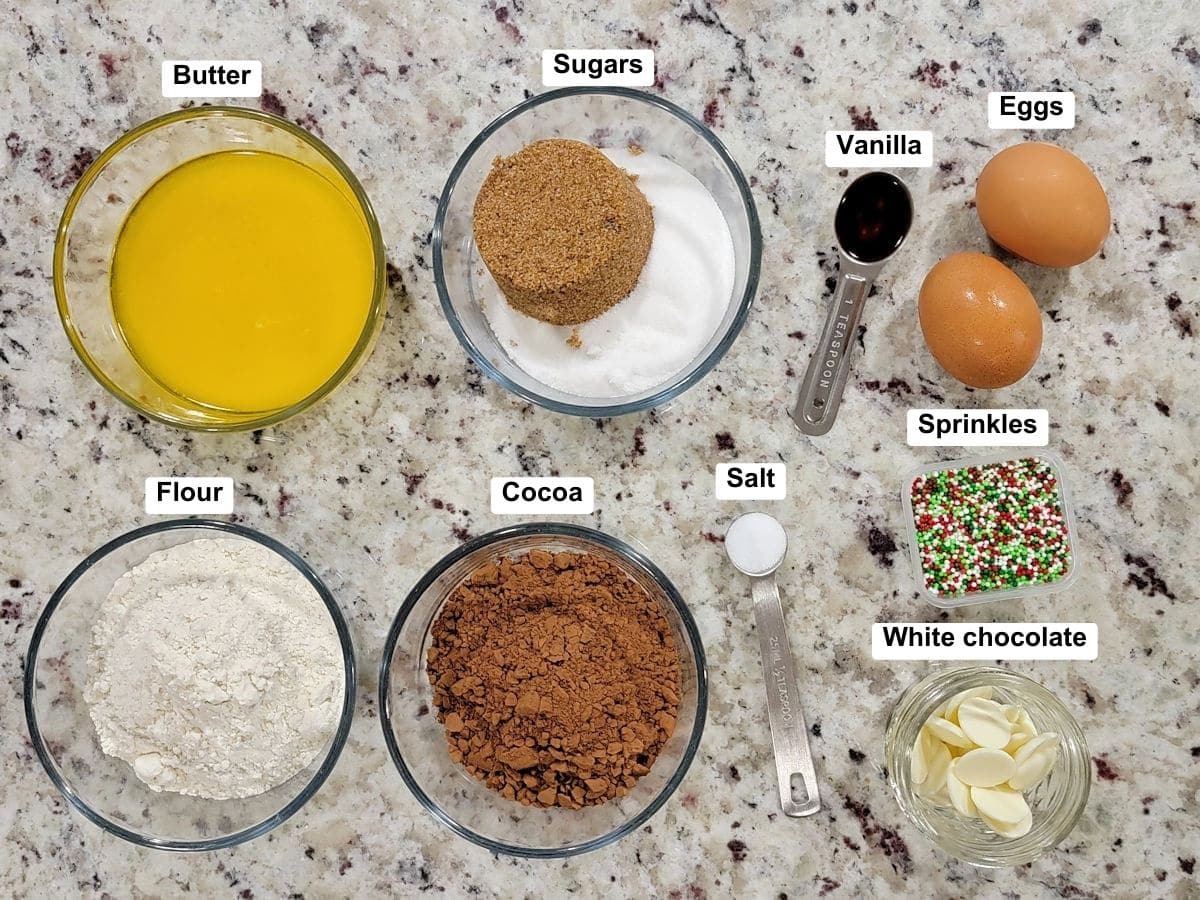
- Unsalted butter - Butter and ¼ teaspoon salt can be substituted with salted butter if desired.
- Cocoa powder - Natural cocoa powder (shown) and Dutch cocoa with both work in this recipe since there are no leavening agents.
- White chocolate melting wafers - Can be substituted with white chocolate chips, but I recommend melting wafers because they're easy to work with and made for melting.
How to make Christmas tree brownies
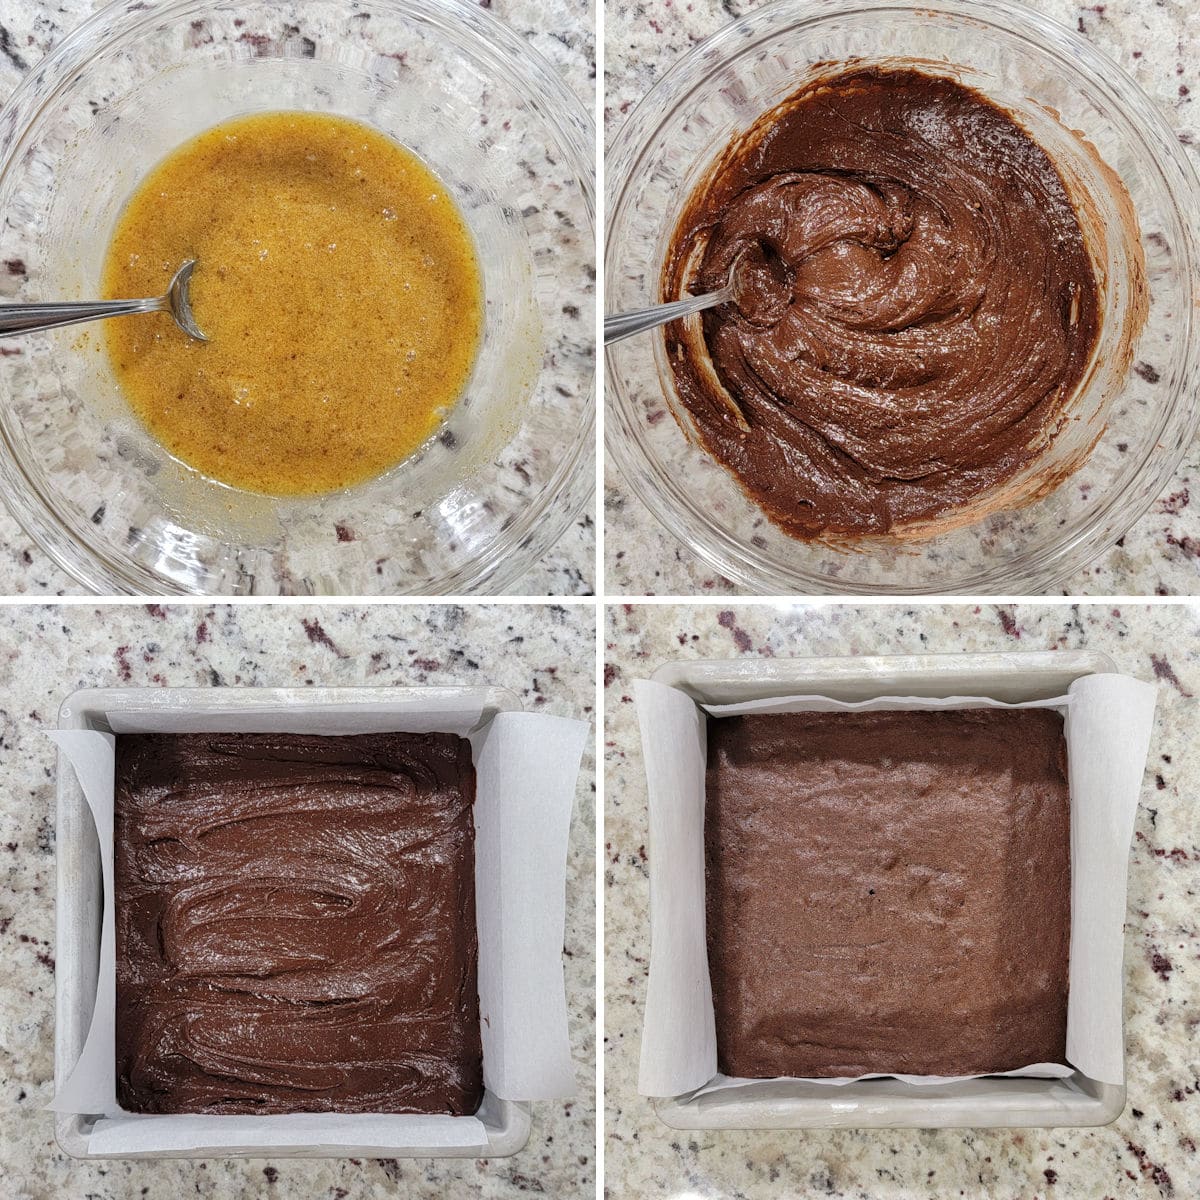
- Stir melted butter, sugars, vanilla, and eggs until fully combined.
- Add sifted dry ingredients slowly to wet mixture and stir until fully incorporated.
- Pour into a parchment lined baking pan.
- Bake at 350F for 19-23 minutes or until a toothpick comes out clean.
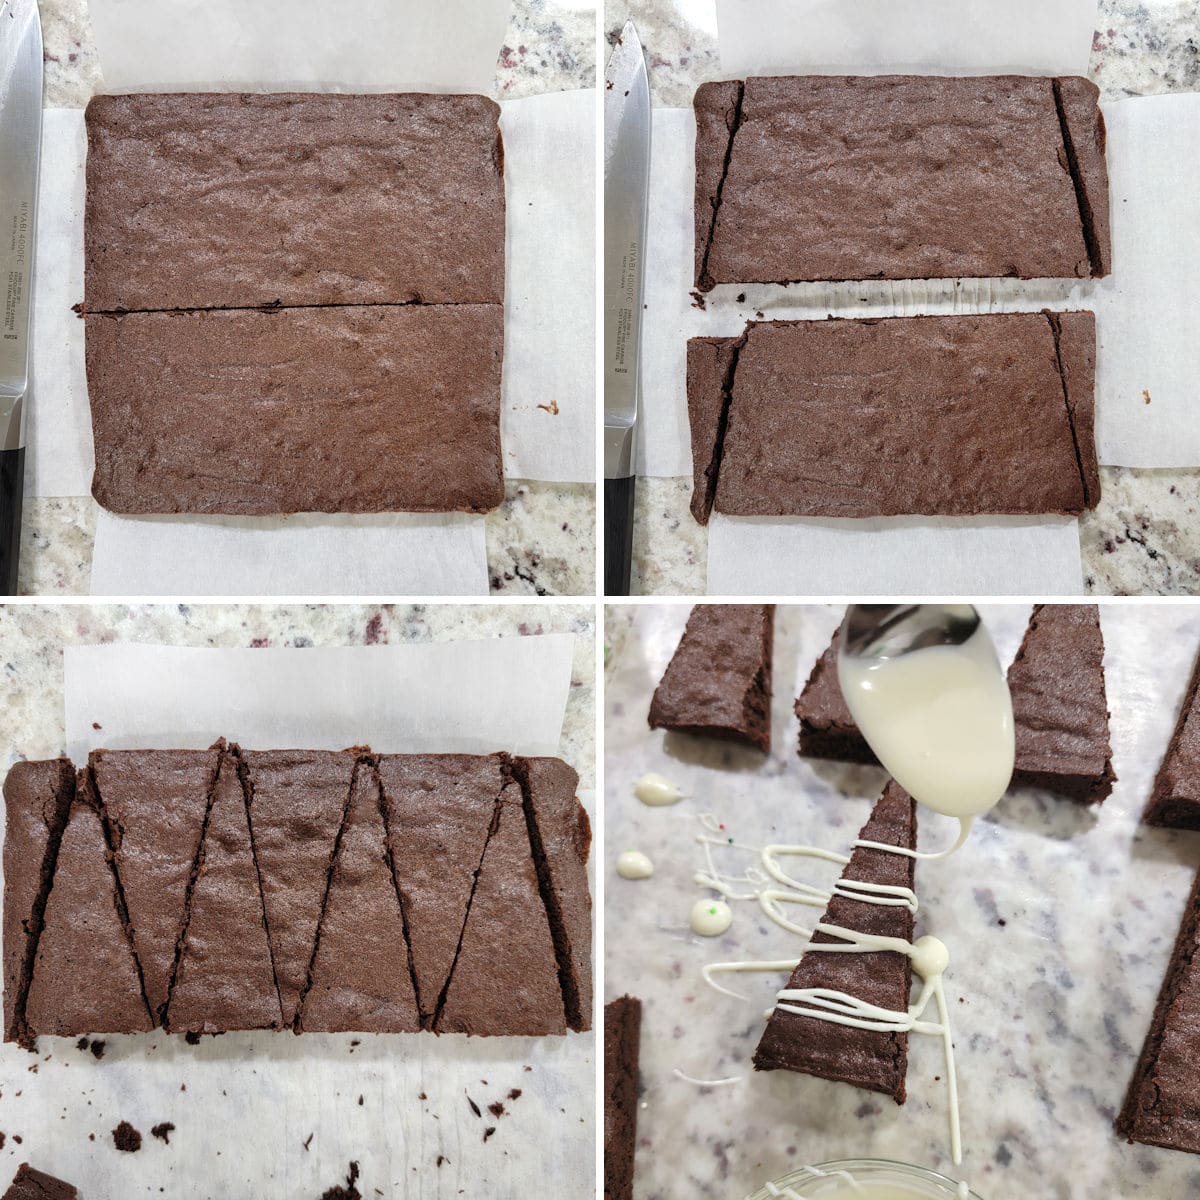
- Pull your cooled brownies out of the pan and cut in half.
- Slice a thin wedge from the edges of each rectangle (about 1 inch on the top, tapering down to the bottom corner).
- Slice brownies into 14 tall triangles (each tree has a 2 inch wide base).
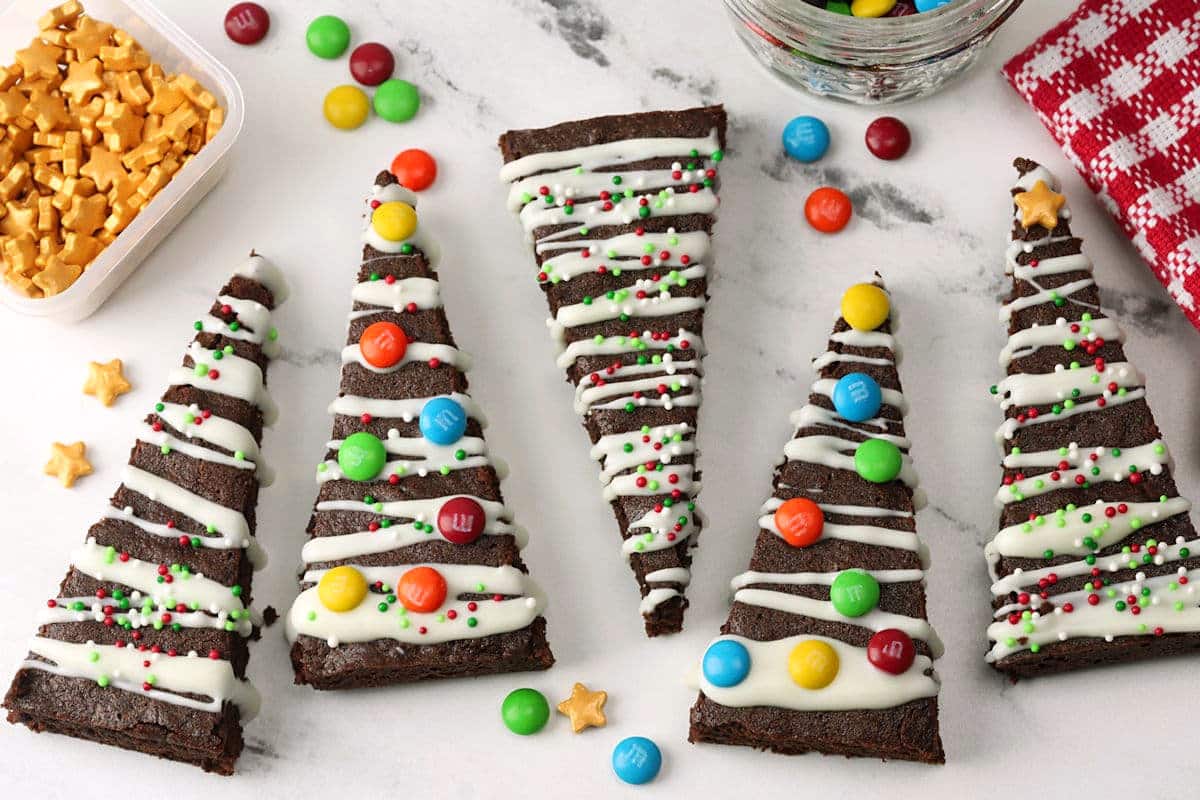
- Decorate with melted white chocolate and sprinkles as desired.
Tips and tricks for baking brownies
Use parchment paper - Parchment paper makes for easy cleanup afterward and brownies lift effortlessly out of the pan after baking.
Don't overmix - Once you've added the dry ingredients, mix only until the ingredients are incorporated. Overmixing after flour has been added can overwork the gluten, making baked goods tough.
For smooth edges - Allow brownies to cool completely in the pan. Use a clean, sharp knife and wipe the blade after every cut. Use a swift, downward motion, not a sawing motion. Sawing creates jagged edges. Optionally, spray your knife with cooking spray after each slice to ensure your cuts turn out smooth.
Decorating your trees - Once your trees are cut and chocolate is melted, drizzle each tree with white chocolate. While the chocolate is wet, top with sprinkles or small candies. Allow the chocolate to dry completely before serving your brownies.
Frequently asked questions
Sprinkles, M&M's candies, crushed candy canes, chocolate chips, chopped nuts, or crushed pretzels work great as brownie tree decorations.
Your brownies will rise a little, but not much. There's no leavening in this recipe which means they'll turn out fairly dense and rich.
Yes, when doubled this recipe will fit in a 9x13 pan. Your baking time may increase by 5 minutes or so.
Recommended
📖 Recipe
Christmas Tree Brownies
Ingredients
Brownies
- ½ cup (113 g) unsalted butter, melted
- ½ cup (99 g) granulated sugar
- ½ cup (106 g) brown sugar
- 1 teaspoon vanilla
- 2 large eggs
- ¾ cup (90 g) all purpose flour
- ½ cup (42 g) cocoa powder
- ½ teaspoon salt
Decorations
- 3 ounces (85 g) white chocolate melting wafers, or chocolate chips
- sprinkles and mini m&m's, optional decorations
Instructions
Brownies
- Preheat oven to 350℉. Line an 8x8 baking pan with parchment paper and set aside.
- In a large bowl, add melted butter, sugars, vanilla, and eggs. Stir until fully combined. Set aside.
- In a separate bowl, sift together the dry ingredients: flour, cocoa powder, and salt. Slowly add to butter mixture and stir until fully incorporated.
- Pour brownie batter into lined 8x8 pan and bake for about 19-23 minutes, or until toothpick inserted into the center comes out with dry crumbs.
- Remove brownies from oven and allow to cool completely. Remove from pan and cut brownies in half. Slice a thin wedge from the edges of each rectangle (about 1 inch on the top, tapering down to the bottom corner). Then, carefully slice brownies into 14 tall triangles (each tree has a 2 inch wide base). Use the photos in the post above as a visual aid.
- Arrange brownie trees onto a piece of wax paper or parchment to be decorated.
Decorations
- In a small bowl, microwave white chocolate wafers (or chocolate chips) in 30 second increments, stirring until melted and smooth.
- Using a spoon, drizzle chocolate across brownies. Optionally, add sprinkles and mini M&M's candies. Allow chocolate to harden before moving or storing.
Equipment Recommendations
Notes
- Storage: Brownies will keep for 3-4 days in a sealed container at room temperature.
- Cocoa: Dutch cocoa can be substituted with natural cocoa powder.

Thank you for the great recipe.
This is a great and simple idea! Hadn`t thought of it before, but will now definitely give it a try. Thanks, friend, and Merry Christmas! 🙂