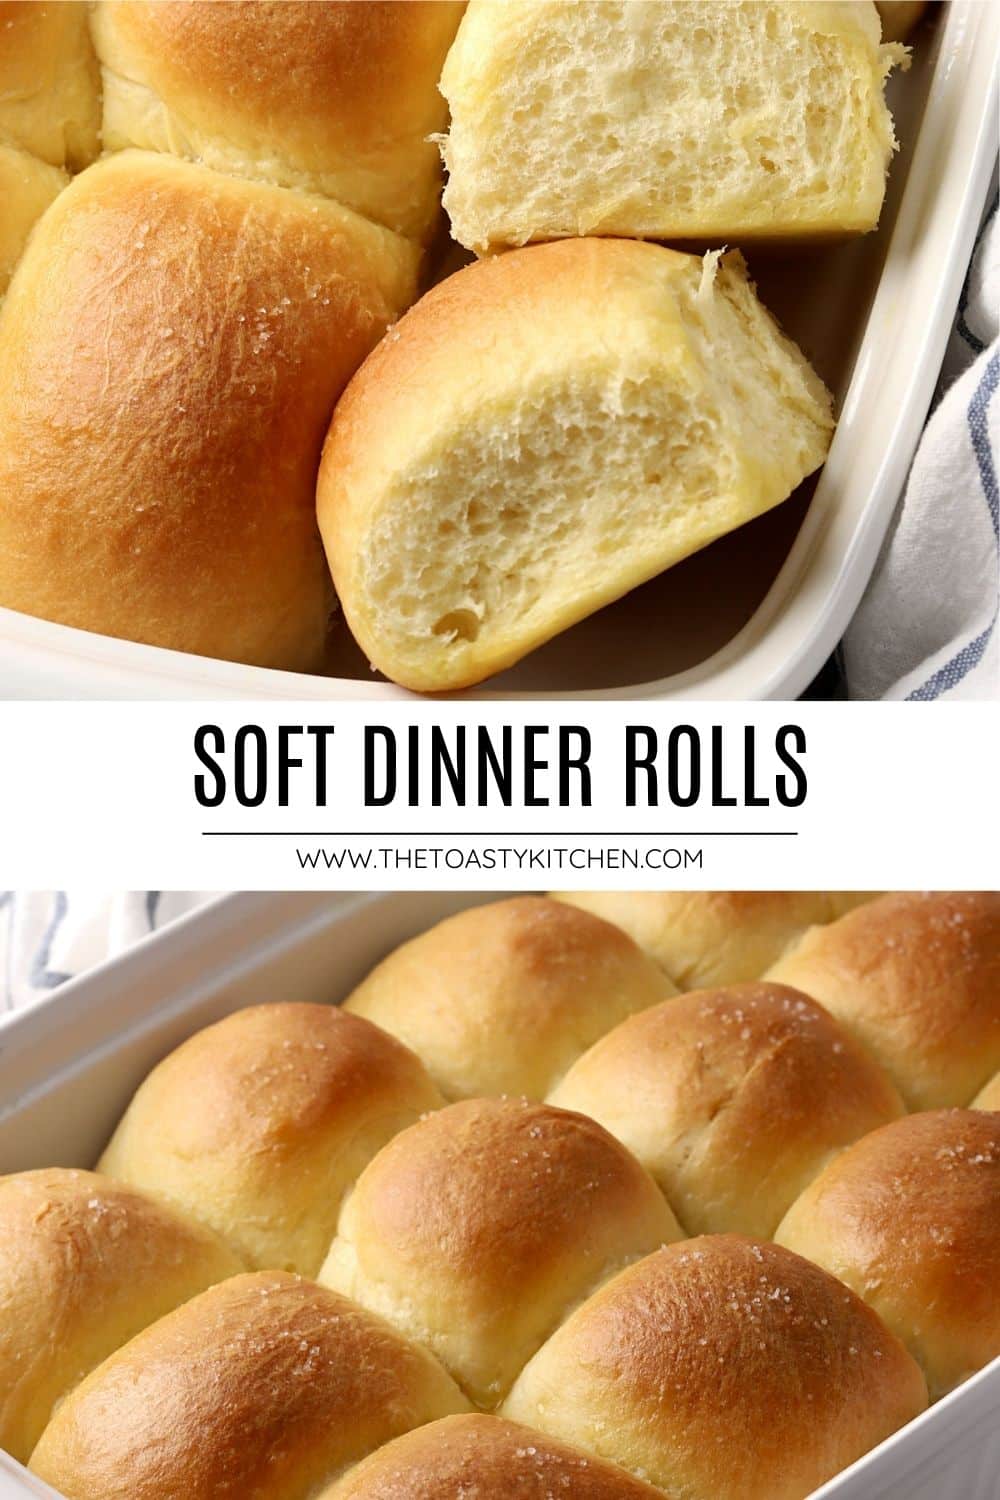
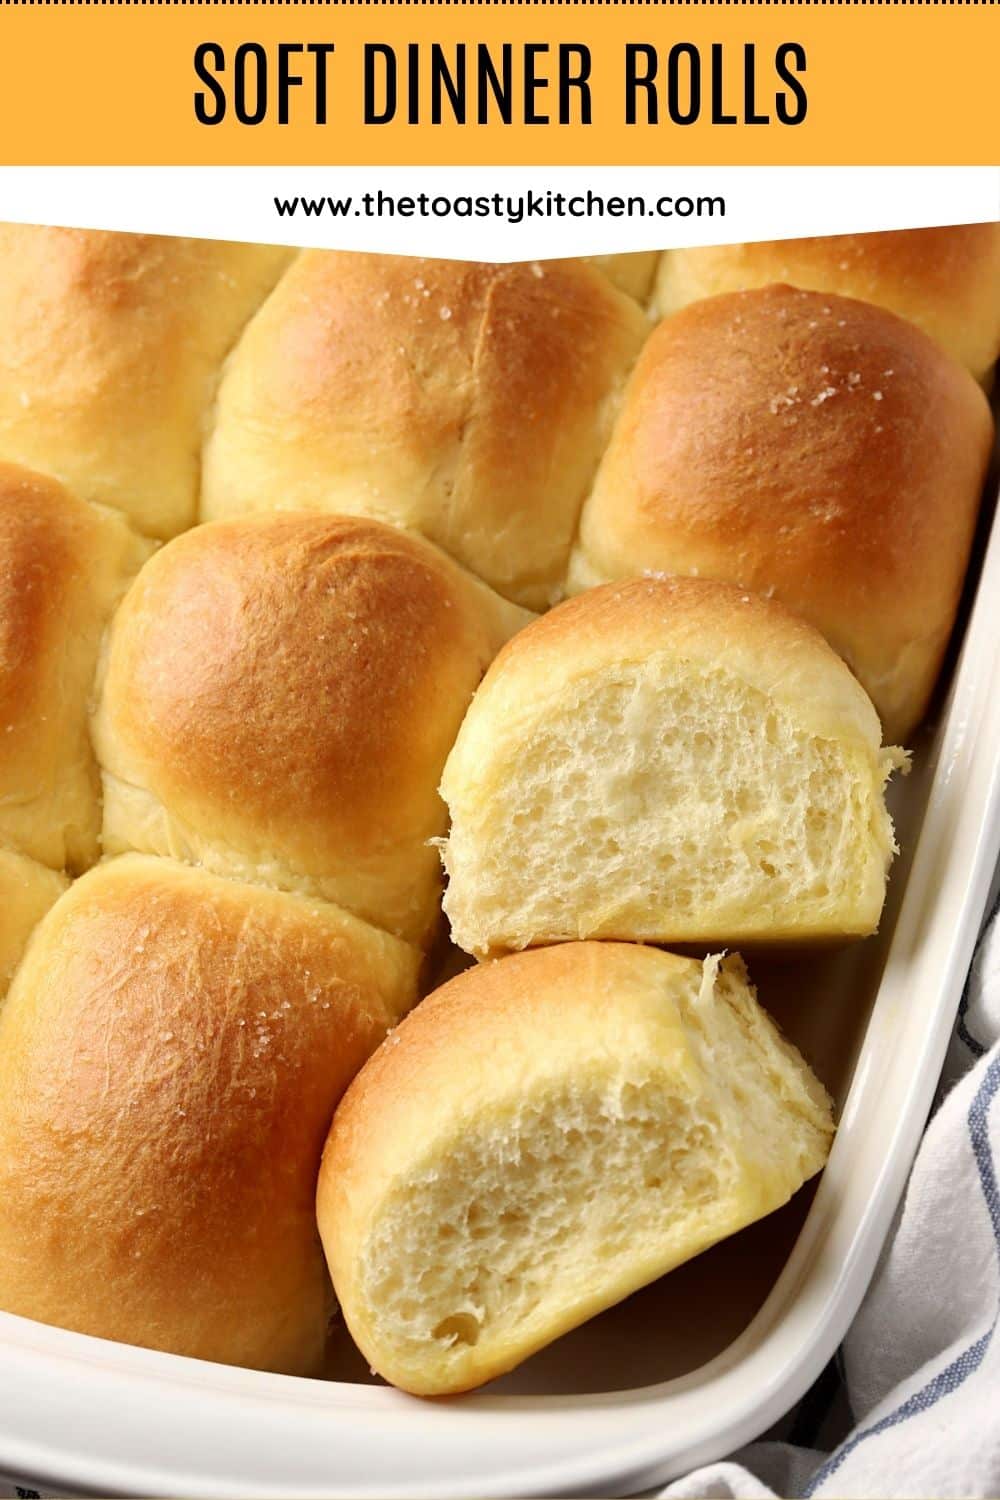

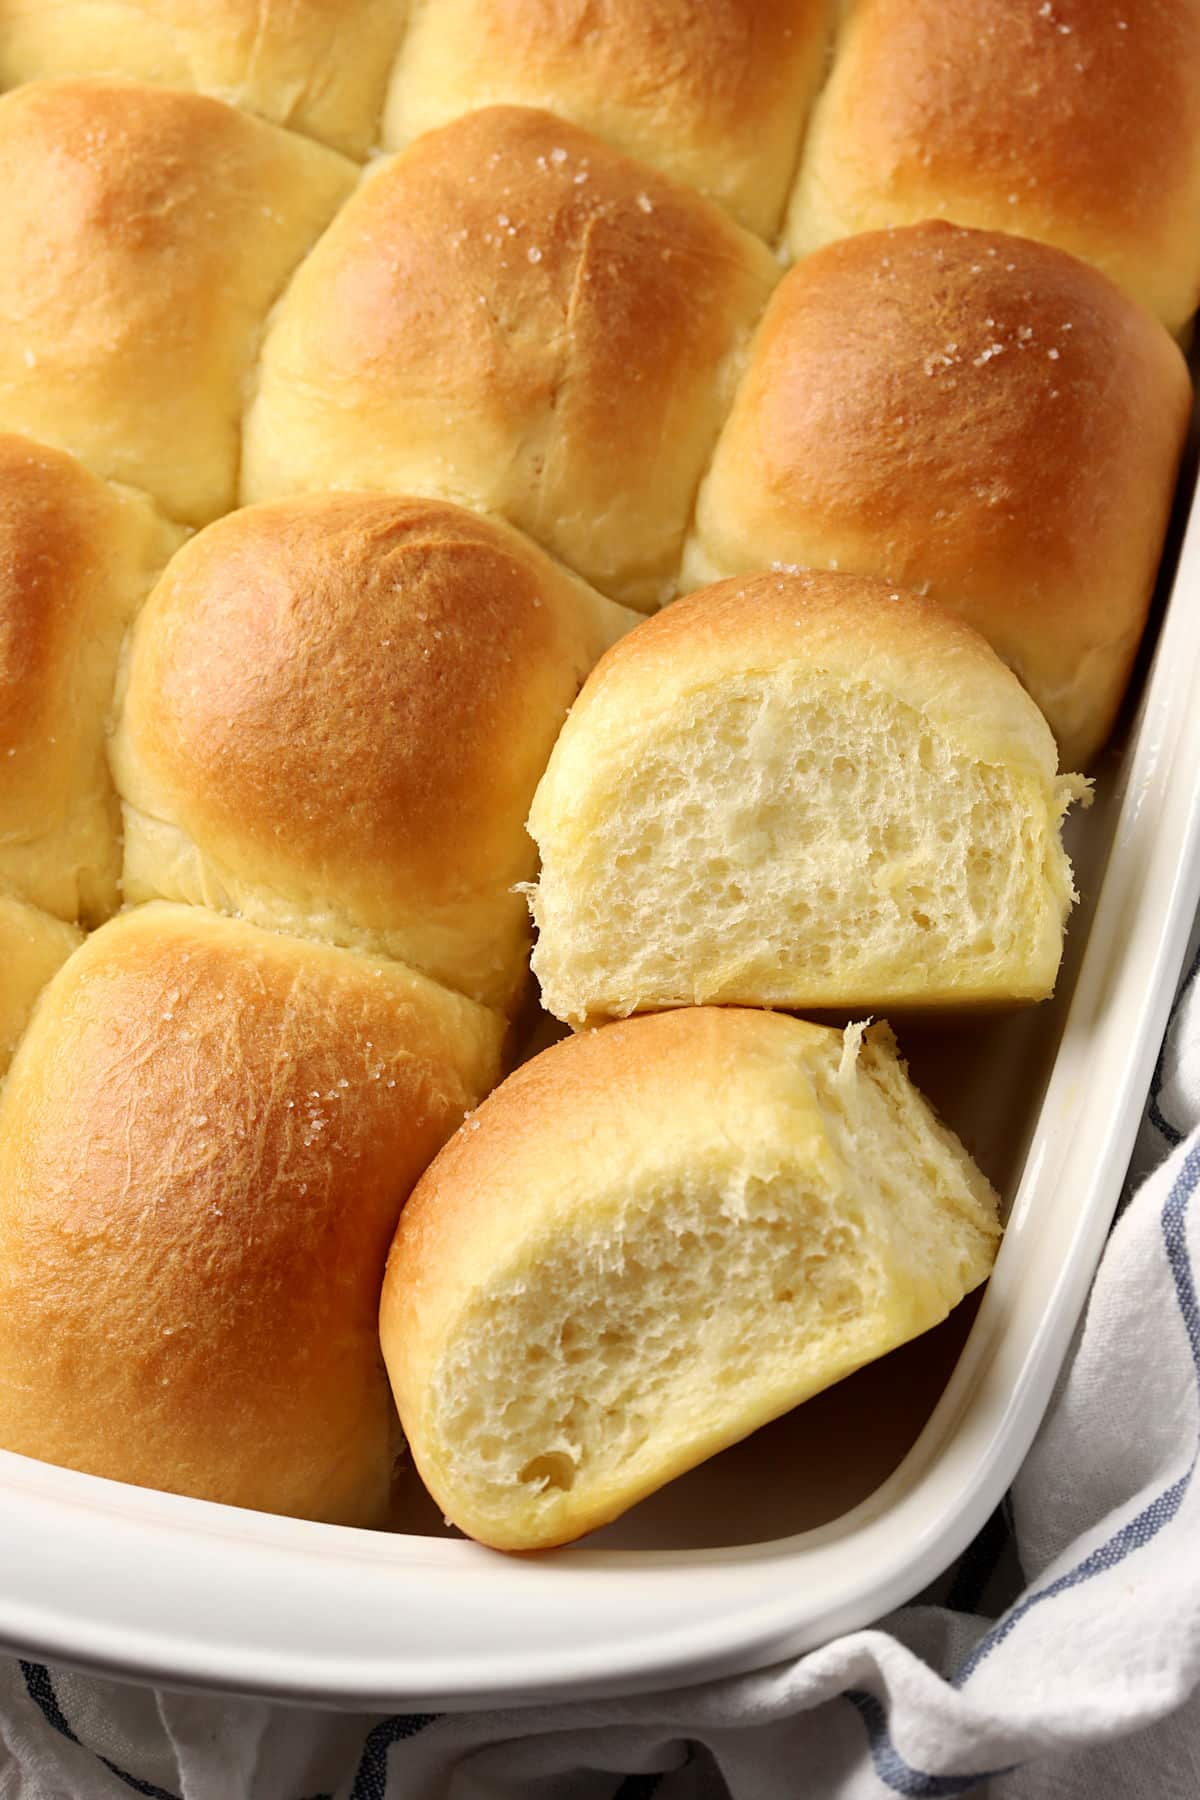
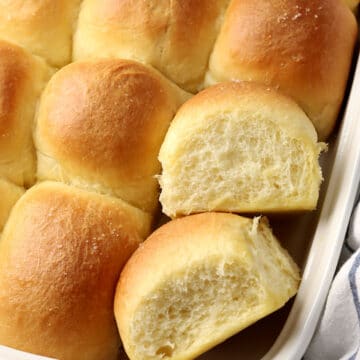
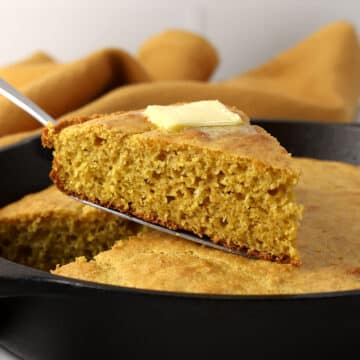
Soft dinner rolls are the best addition to your next family dinner or holiday meal. They're fluffy, buttery, and turn out perfectly golden brown on top.
Heather's recipe summary
Flavor/texture: A classic yeast dinner roll that's fluffy and buttery.
Yeast: This recipe calls for instant yeast but active dry yeast will also work (your rise times will be longer).
Yield: 12 large rolls or 15-18 smaller rolls
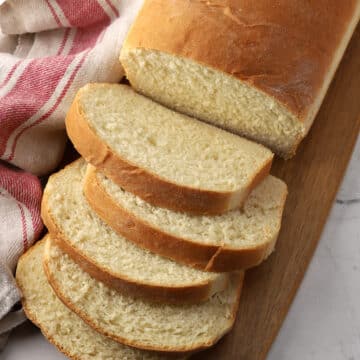
Similar to: Hamburger Buns
Jump to:
Ingredients and substitutions
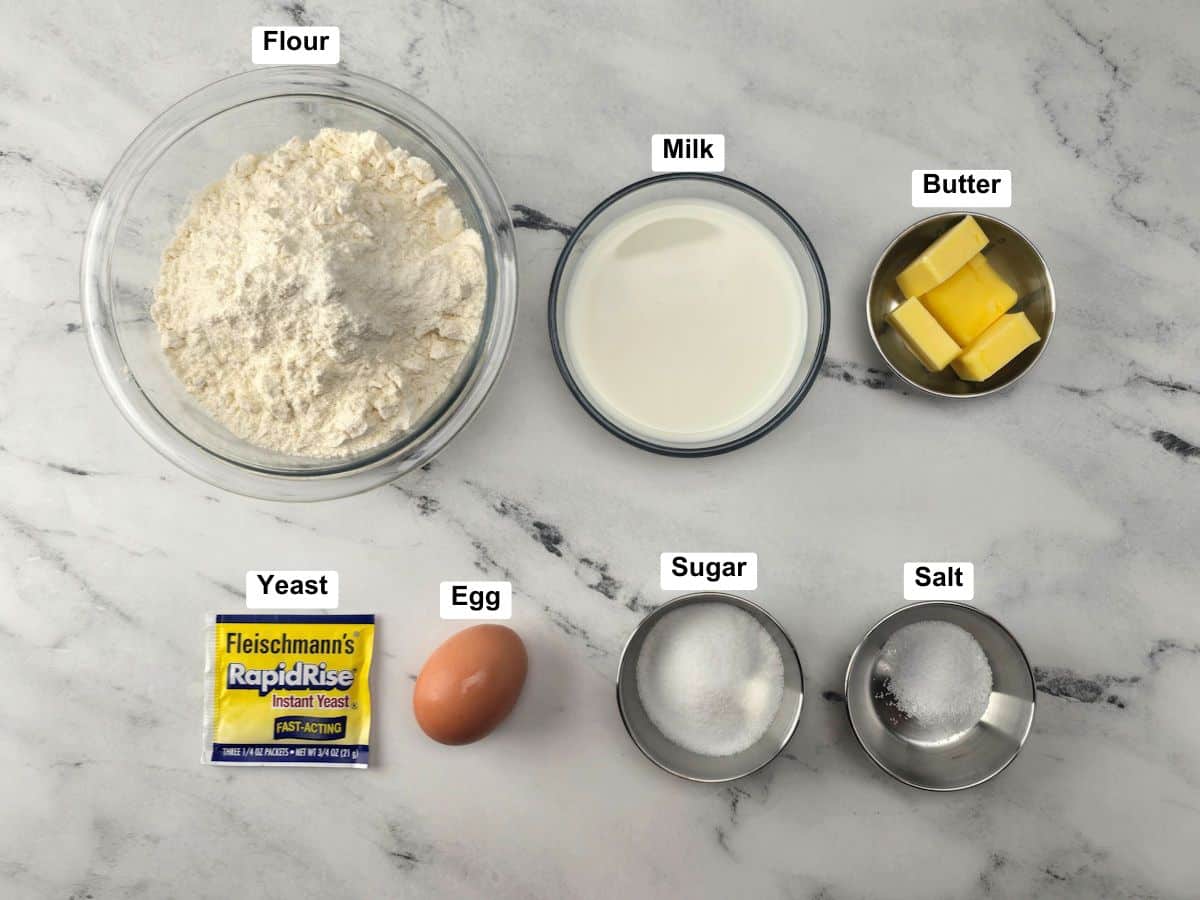
- Flour - Bread flour or a high protein all-purpose flour work best in this recipe. I use and recommend King Arthur brand flour.
- Milk - Whole milk adds the best moisture and flavor but a lower fat milk can work in a pinch.
- Yeast - I use instant yeast in this recipe but dry active yeast will also work. If you're using dry active yeast, your rise times will be longer. I include an activation step no matter what yeast you're using (this ensures your yeast is fresh and active, preventing potential wasted ingredients if your yeast doesn't activate properly).
How to make soft dinner rolls
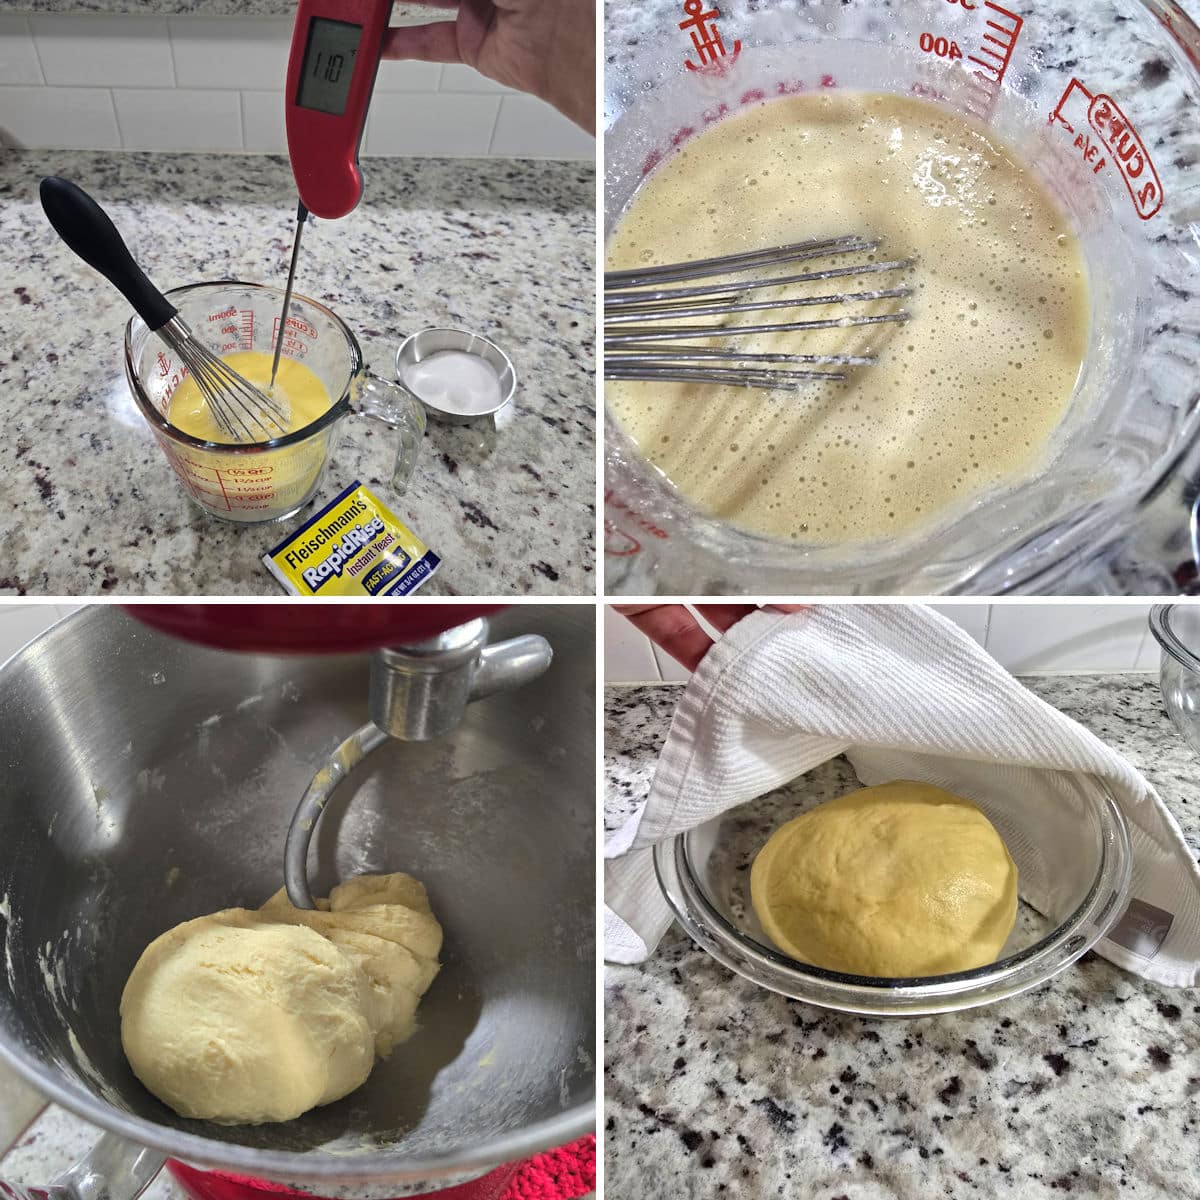
- In a microwave safe bowl, add milk and butter pieces. Microwave in 20 second increments until melted and warm (about 110F), not hot.
- Add sugar and yeast and whisk to combine. Allow to set for 5 minutes. Mixture will look frothy and bubbly - this means your yeast is fresh and active!
- Add all ingredients to a stand mixer. Mix, adding more flour as needed, until dough pulls away from the sides and slowly bounces back when pressed.
- Transfer dough to a greased bowl and cover until doubled in size, about an hour.
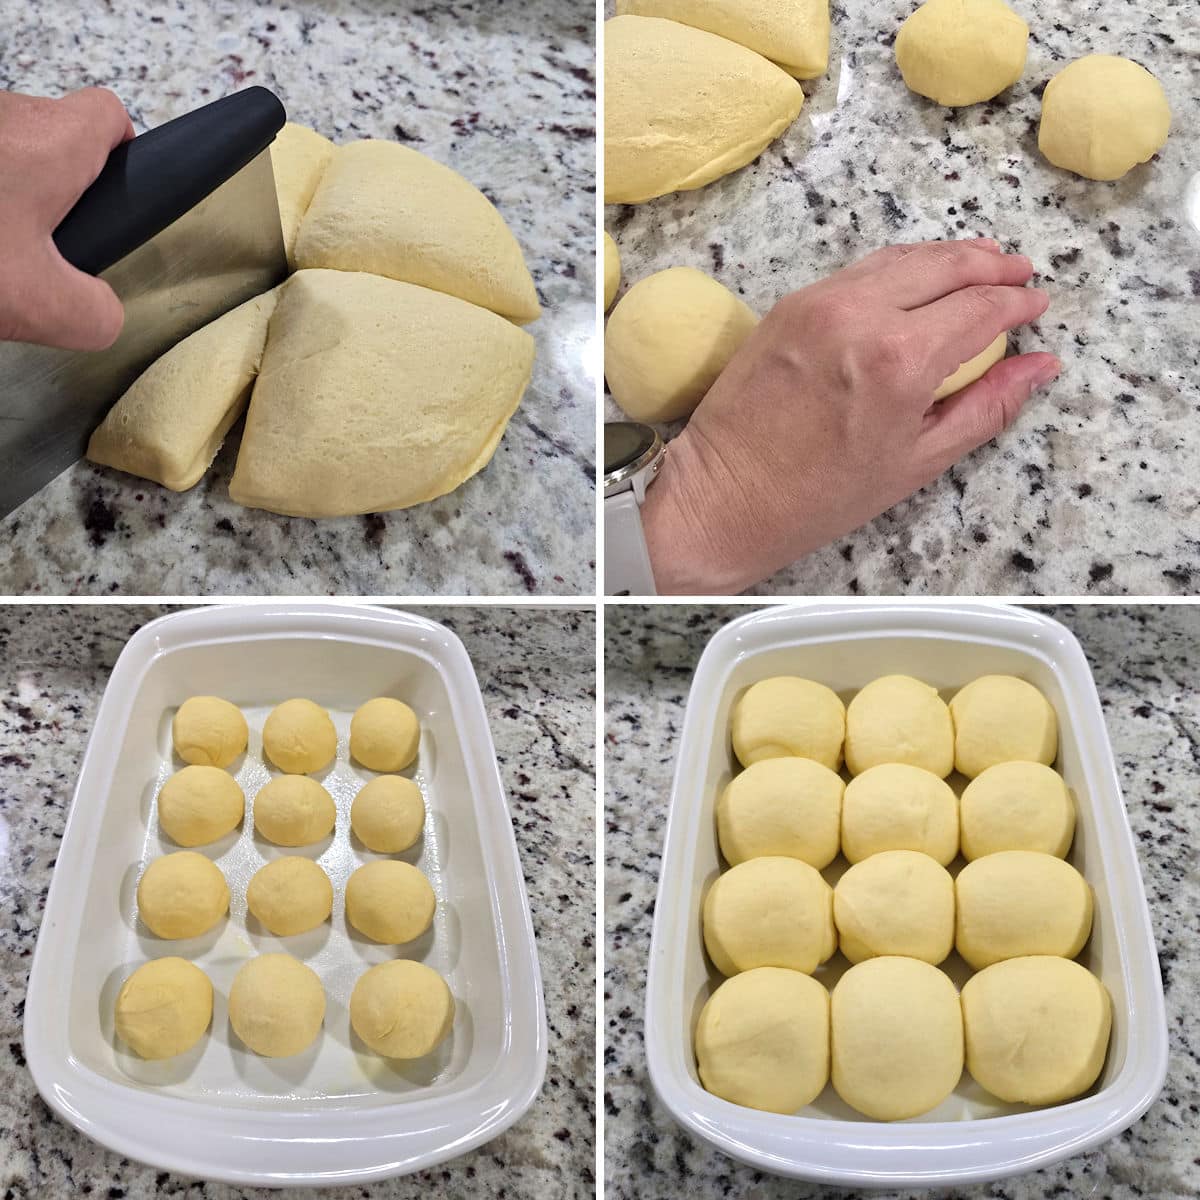
- Divide dough into 12 (or more) pieces. I like to use a bench scraper for accuracy.
- Roll dough into round balls.
- Place in a greased 9x13 pan.
- Cover and allow to rise until doubled in size, about an hour.

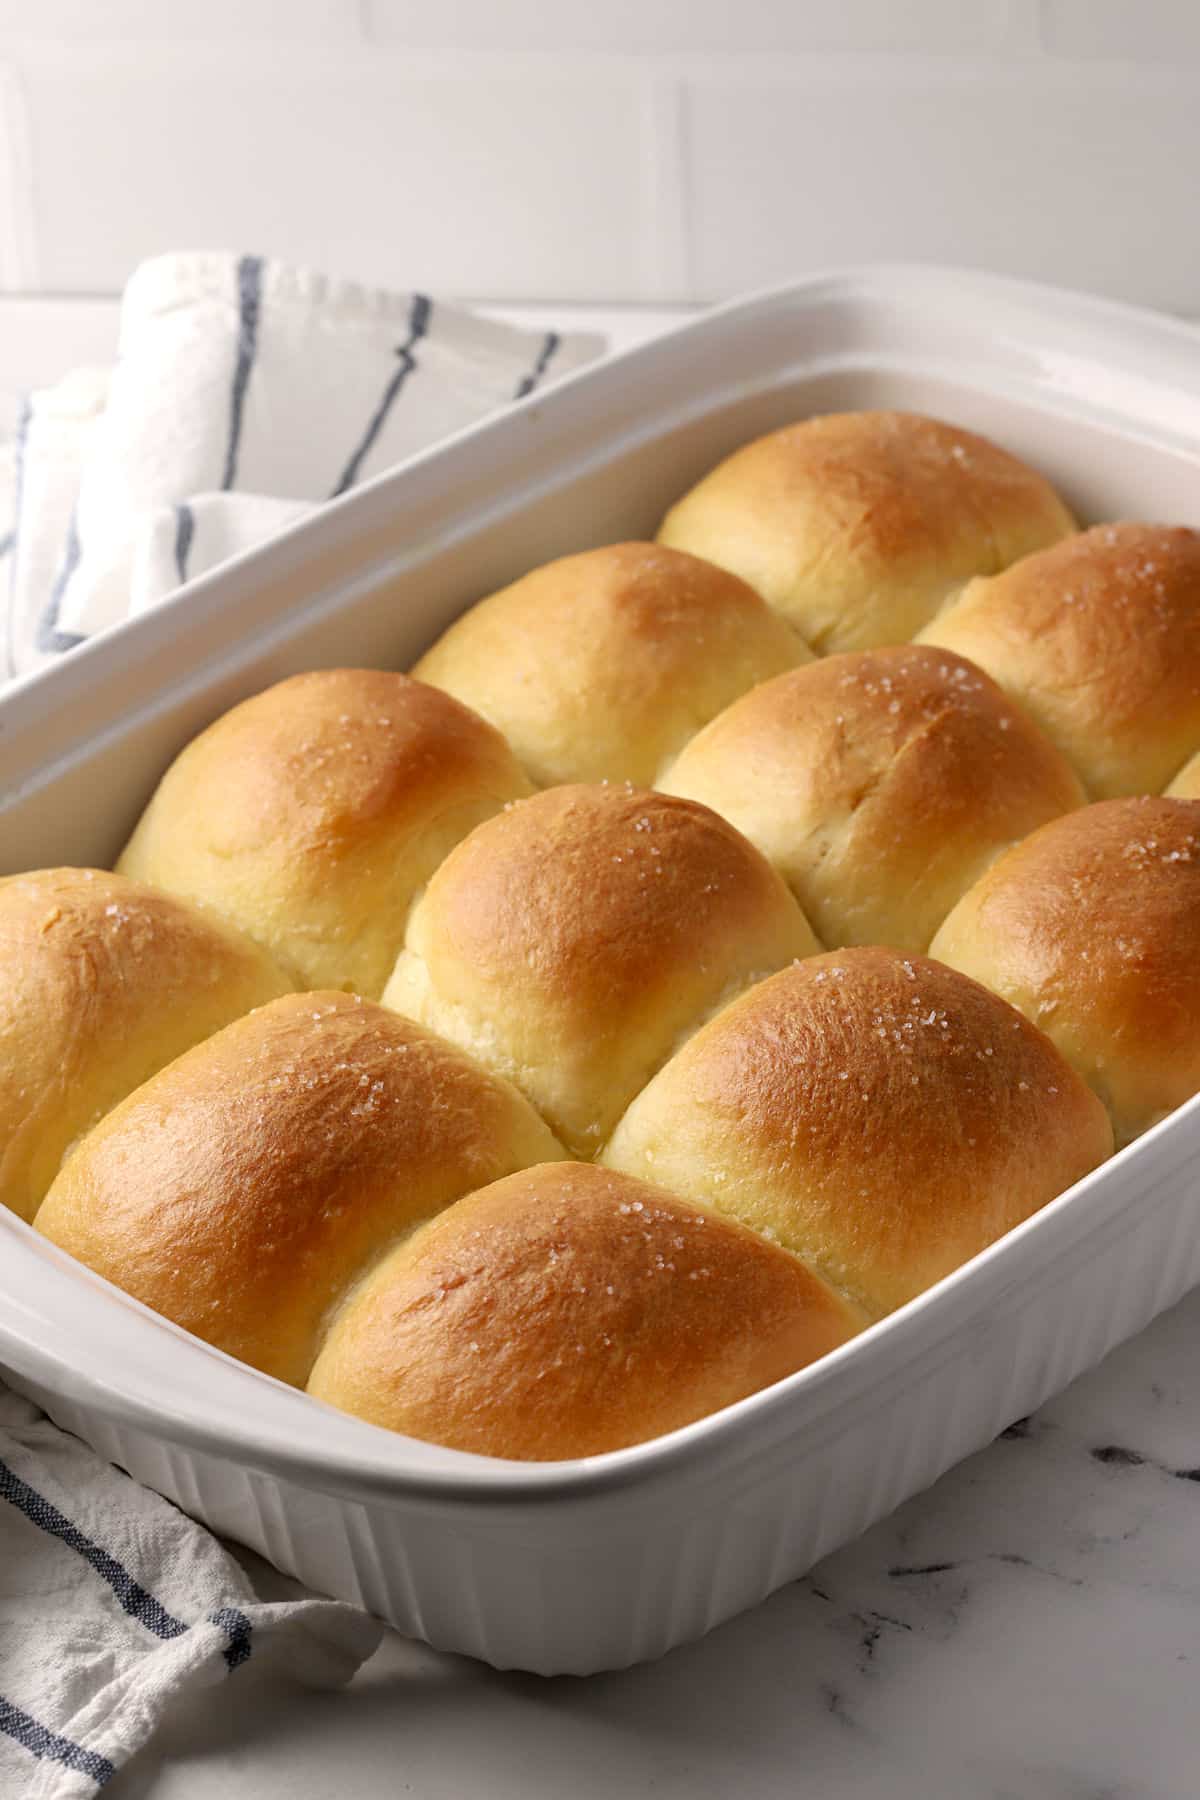
- Brush the tops with melted butter.
- Bake until golden brown across the top and internal temperature reaches 165F.
- Optionally, brush with more butter and sprinkle with flaky salt before serving.
- Dividing dough into 12 pieces makes large dinner rolls. For smaller rolls, divide into 15-18 pieces.
Heather's Top Tip
For accurate results every time, use a kitchen scale to measure flour by weight. If you don't have a kitchen scale, use the spoon and level method. Stir the flour (especially if it's been packed down in a bag/container), then gently spoon into the measuring cup, leveling off the top with a knife. Scooping with a measuring cup compacts flour into the cup and adds up to 25% extra to the recipe, resulting in dry, bland baked goods.
Tips and tricks
Activate your yeast - Normally, only active dry yeast requires an activation step (whisking into warm milk with sugar and resting until foamy), but we're using instant yeast. I like to include this step to ensure your yeast activates. This helps prevent wasted ingredients several steps (and hours) in when your rolls don't rise and you realize your yeast is expired. Also, if you've accidentally used active dry yeast instead of instant, the recipe will still work for you!
Dough looking sticky? - Does your dough look wet and sticky, and it's not pulling away from the sides of the bowl? Add more flour, 1 tablespoon at a time, until the dough comes together into a ball. If your home is humid (maybe it just rained or it's summertime), you'll need a bit of extra flour to bring the dough together.
Don't have a stand mixer? - Your dough can be mixed and kneaded by hand on the countertop. This is how I make my cinnamon rolls! Mix ingredients together with a spoon in a large bowl. Once a sticky dough forms, turn dough out onto a floured surface. Knead by hand until you have a smooth, uniform ball that slowly bounces back when pressed. This process will take slightly longer but works just as well.
Use an instant-read thermometer - It can be hard to tell when yeast rolls are done baking using visual cues alone so I use an instant-read thermometer. Dinner rolls are done when they reach 195F in the center. A thermometer prevents doughy or dry rolls and ensures they turn out perfectly every single time.
Frequently asked questions
Yes. After you've shaped your dough into rolls and placed them in the 9x13 pan, cover and transfer to the refrigerator to rest overnight. This replaces the second 1-hour rise in the recipe card. When you're ready to bake your rolls, pull them out of the refrigerator while your oven preheats, then bake as directed in the recipe card.
Yes, rolls and dough can be frozen for up to 3 months. If you've frozen dough, allow it to thaw and rise for 4-5 hours before baking.
Yes, this recipe works with active dry or instant yeast. If you're using active dry yeast, your rise times will take slightly (maybe 15-20 minutes) longer.
Rolls that are doughy in the middle weren't baked long enough. Dry rolls happen from overbaking (or omitting the moisture-adding ingredients in the recipe like butter, egg, or milk). Use an instant-read thermometer to tell exactly when your rolls are done. They'll be fluffy, moist, and perfectly baked when they reach 165F in the center.
I like to include this step for both types of yeast to ensure you're not accidentally using expired yeast. If you're confident that your instant yeast is fresh and will activate, feel free to skip the 5 minute rest in step 2. If you're using active dry yeast, this step is a must and can't be skipped.
Recommended


📖 Recipe
Soft Dinner Rolls
Ingredients
- 1 cup (227 g) whole milk
- ¼ cup (56 g) unsalted butter, sliced into pieces
- 3 tablespoons (38 g) granulated sugar
- 2 ¼ teaspoons instant yeast, one standard packet
- 3 cups (360 g) all-purpose flour
- 1 teaspoon salt
- 1 large egg, room temperature
- 2 tablespoons unsalted butter, melted (for brushing on top)
Instructions
- In a microwave safe bowl, add milk and butter pieces. Microwave in 20 second increments until butter has melted and mixture is warm to the touch, but not hot (about 110℉).
- Whisk in sugar and yeast and allow to rest for 5 minutes. Mixture will look foamy and bubbly. (If it's not foamy after 5 minutes, your yeast may be expired and rolls will not rise properly.)
- Meanwhile, add flour, salt, and egg to the bowl of a stand mixer fitted with a paddle attachment or dough hook.
- Add yeast mixture to the stand mixer. Mix on low until a soft, sticky dough forms.
- Beat on medium speed until the dough starts to pull away from the sides of the bowl (this takes about 2 minutes). If dough looks wet and sticky, add more flour, 1 tablespoon at a time, until dough comes together and looks soft and slightly tacky, not sticky.
- Beat for an additional 5 minutes. Dough should feel soft and slowly bounce back when pressed.
- Transfer dough to a lightly greased bowl, tossing dough to coat all sides, and cover with plastic wrap or an airtight lid. Allow to rise for about 1 hour at room temperature, or until doubled in size.
- Grease a 9x13 baking dish and set aside.
- Punch dough down to release air. Divide dough into 12 equal sized pieces (use a bench scraper for easy dividing). For smaller rolls, divide dough into 15-18 pieces.
- Roll each piece into a round, smooth ball and place into the prepared pan.
- Lightly cover rolls with a towel and allow to rise at room temperature, about 1 hour.
- Meanwhile, preheat oven to 350℉ and adjust rack to the center of the oven (so the tops and bottoms brown evenly).
- Melt 2 tablespoons of butter and brush over rolls. Bake for 22-26 minutes, or until golden brown across the tops and the centers reach 195F in the center. Allow to cool slightly.
- Optionally, brush with more melted butter and top with flaky sea salt just before serving.
Equipment Recommendations
Notes
- Yeast: This recipe can be prepared with instant or dry active yeast. If using dry active yeast, your rise times will take slightly (15-20 minutes) longer.
- To prepare without a stand mixer: Mix ingredients in a large bowl with a wooden spoon until a sticky dough forms. Turn dough out onto a lightly floured surface. Using floured hands, knead the dough for 3-5 minutes. Dough will look smooth, slightly tacky, and slowly springs back when gently pressed.
- Overnight directions: After you've shaped your dough into rolls and placed them in the 9x13 pan, cover and transfer to the refrigerator to rest overnight. This replaces the second 1-hour rise in the recipe card. When you're ready to bake your rolls, pull them out of the refrigerator while your oven preheats, then bake as directed in the recipe card.
- Storage: Keeps 2-3 days at room temperature, frozen for up to 3 months
I had so much fun creating this recipe! I hope you give it a try and love it as much as I do. If you have a question, check out the post above, which is packed with information about the recipe. Tried the recipe? I'd love to hear your thoughts — leave a comment and a star rating to share your feedback!